|
 |
The Memotech MTX Series |
 |
Memotech MTX
Speculator

This page provides details of fault finding, and hopefully
fixing, my Memotech Speculator.

I had hoped to be able to add a
Speculator to
my collection for a long time, but had been disappointed, until
Martin Allcorn did me a very good "deal" on his Speculator.
Martin had not tested it, but given that the hardware is very
simple, consisting of a RAM chip, two PALs, two 74LS chips, a
couple of resistors and a couple of capacitors, hopes were high
that it would work "out of the box". Even if it were faulty, I
expected that it should have been relatively easy to repair-
particularly as the original designer (Tony Brewer) had helped
me to develop a schematic for the board and provided the logic
equations for the PAL chips.
Unfortunately, when I tried out the Speculator by attaching
it to my MTX and attempting the load the original tape program,
it did not appear to work - the tape was recognised by the MTX
with the name "SPECPROGS1" and appeared to load. However, when
it got to the end of the tape, the computer just displayed the
"Ready" prompt and nothing appeared to have been be loaded into
memory.
[ I subsequently found out from Tony Brewer that this is the
expected behaviour. On loading the tape, the MTX tests for the
presence of a Speculator by attempting to write to the device
and then read back the values written. If this test fails, the
MTX returns to the BASIC ROM. ]
So, some work required . . . . .
|
MTX Speculator |
|
The
Speculator consists of a small PCB mounted in a
ROMPAK case which attaches to the expansion port on
the left hand side of the computer. |
 |
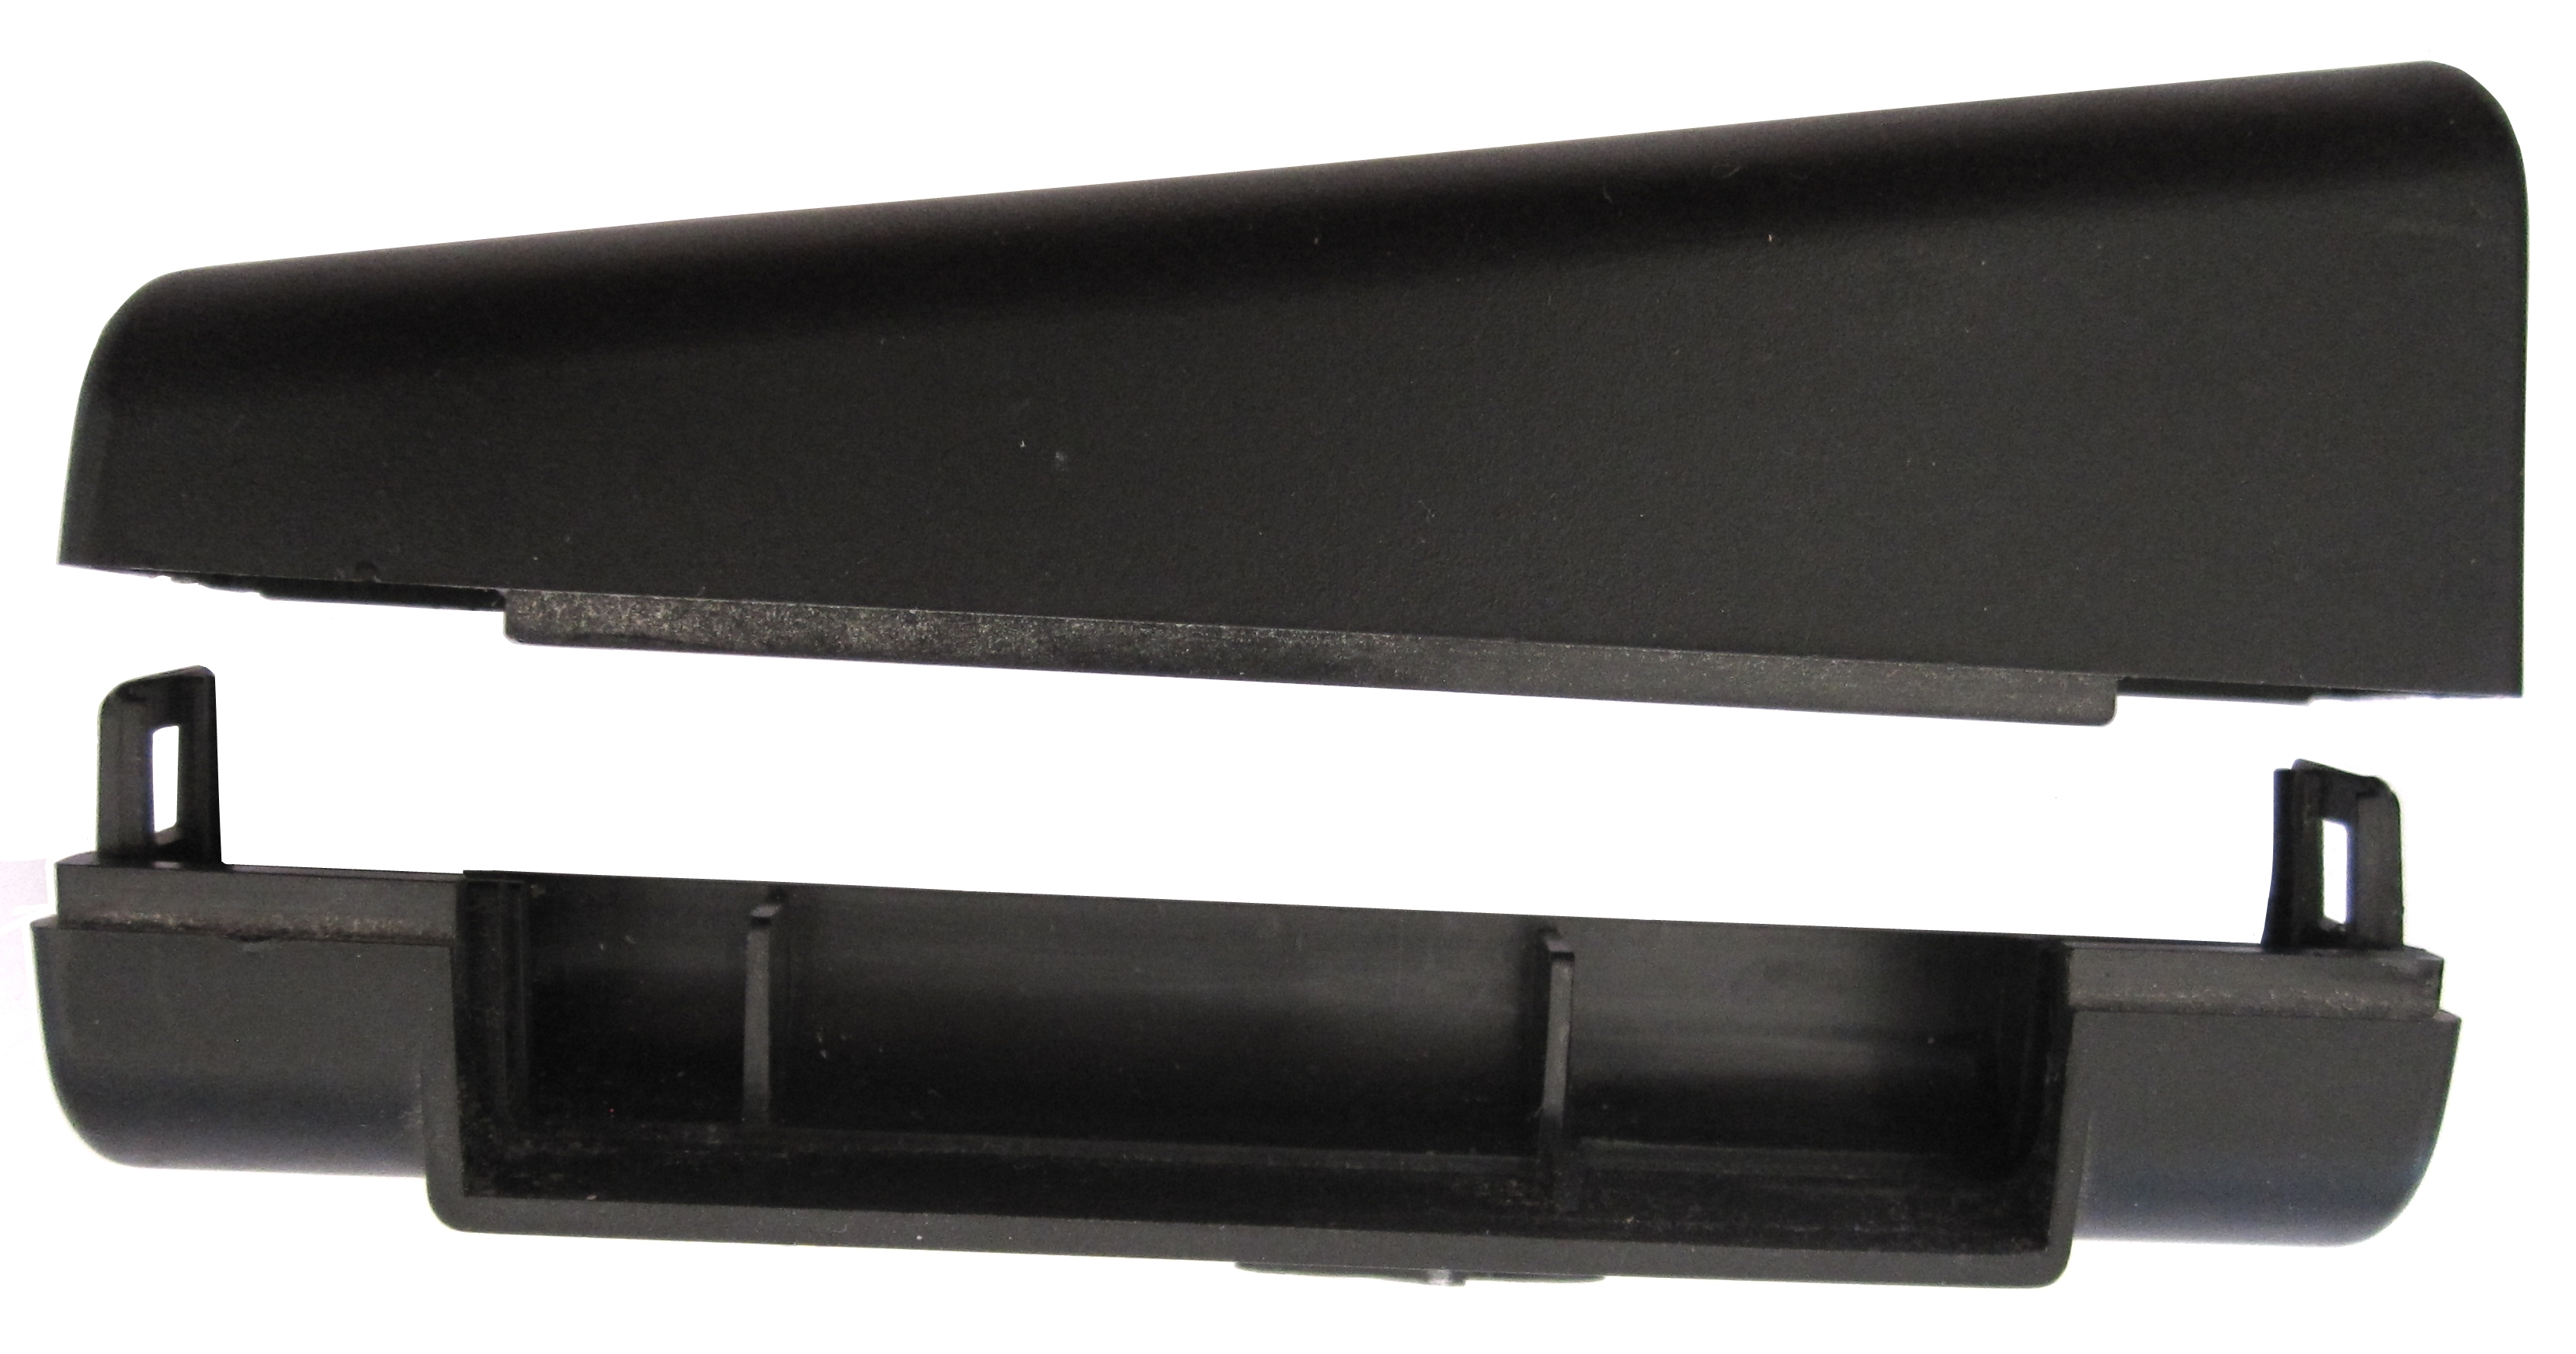
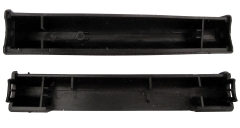
| As you can see by the join above the edge
connector, the case is in two halves that are
"snap-to-fit", and the label on the front side is
applied over the join. The label needs to be removed
before the case can be split and the board revealed.
Unfortunately, despite trying very carefully to peel
back the label using the very sharp blade of a
trimming knife, the label did not survive the
process. |
 |
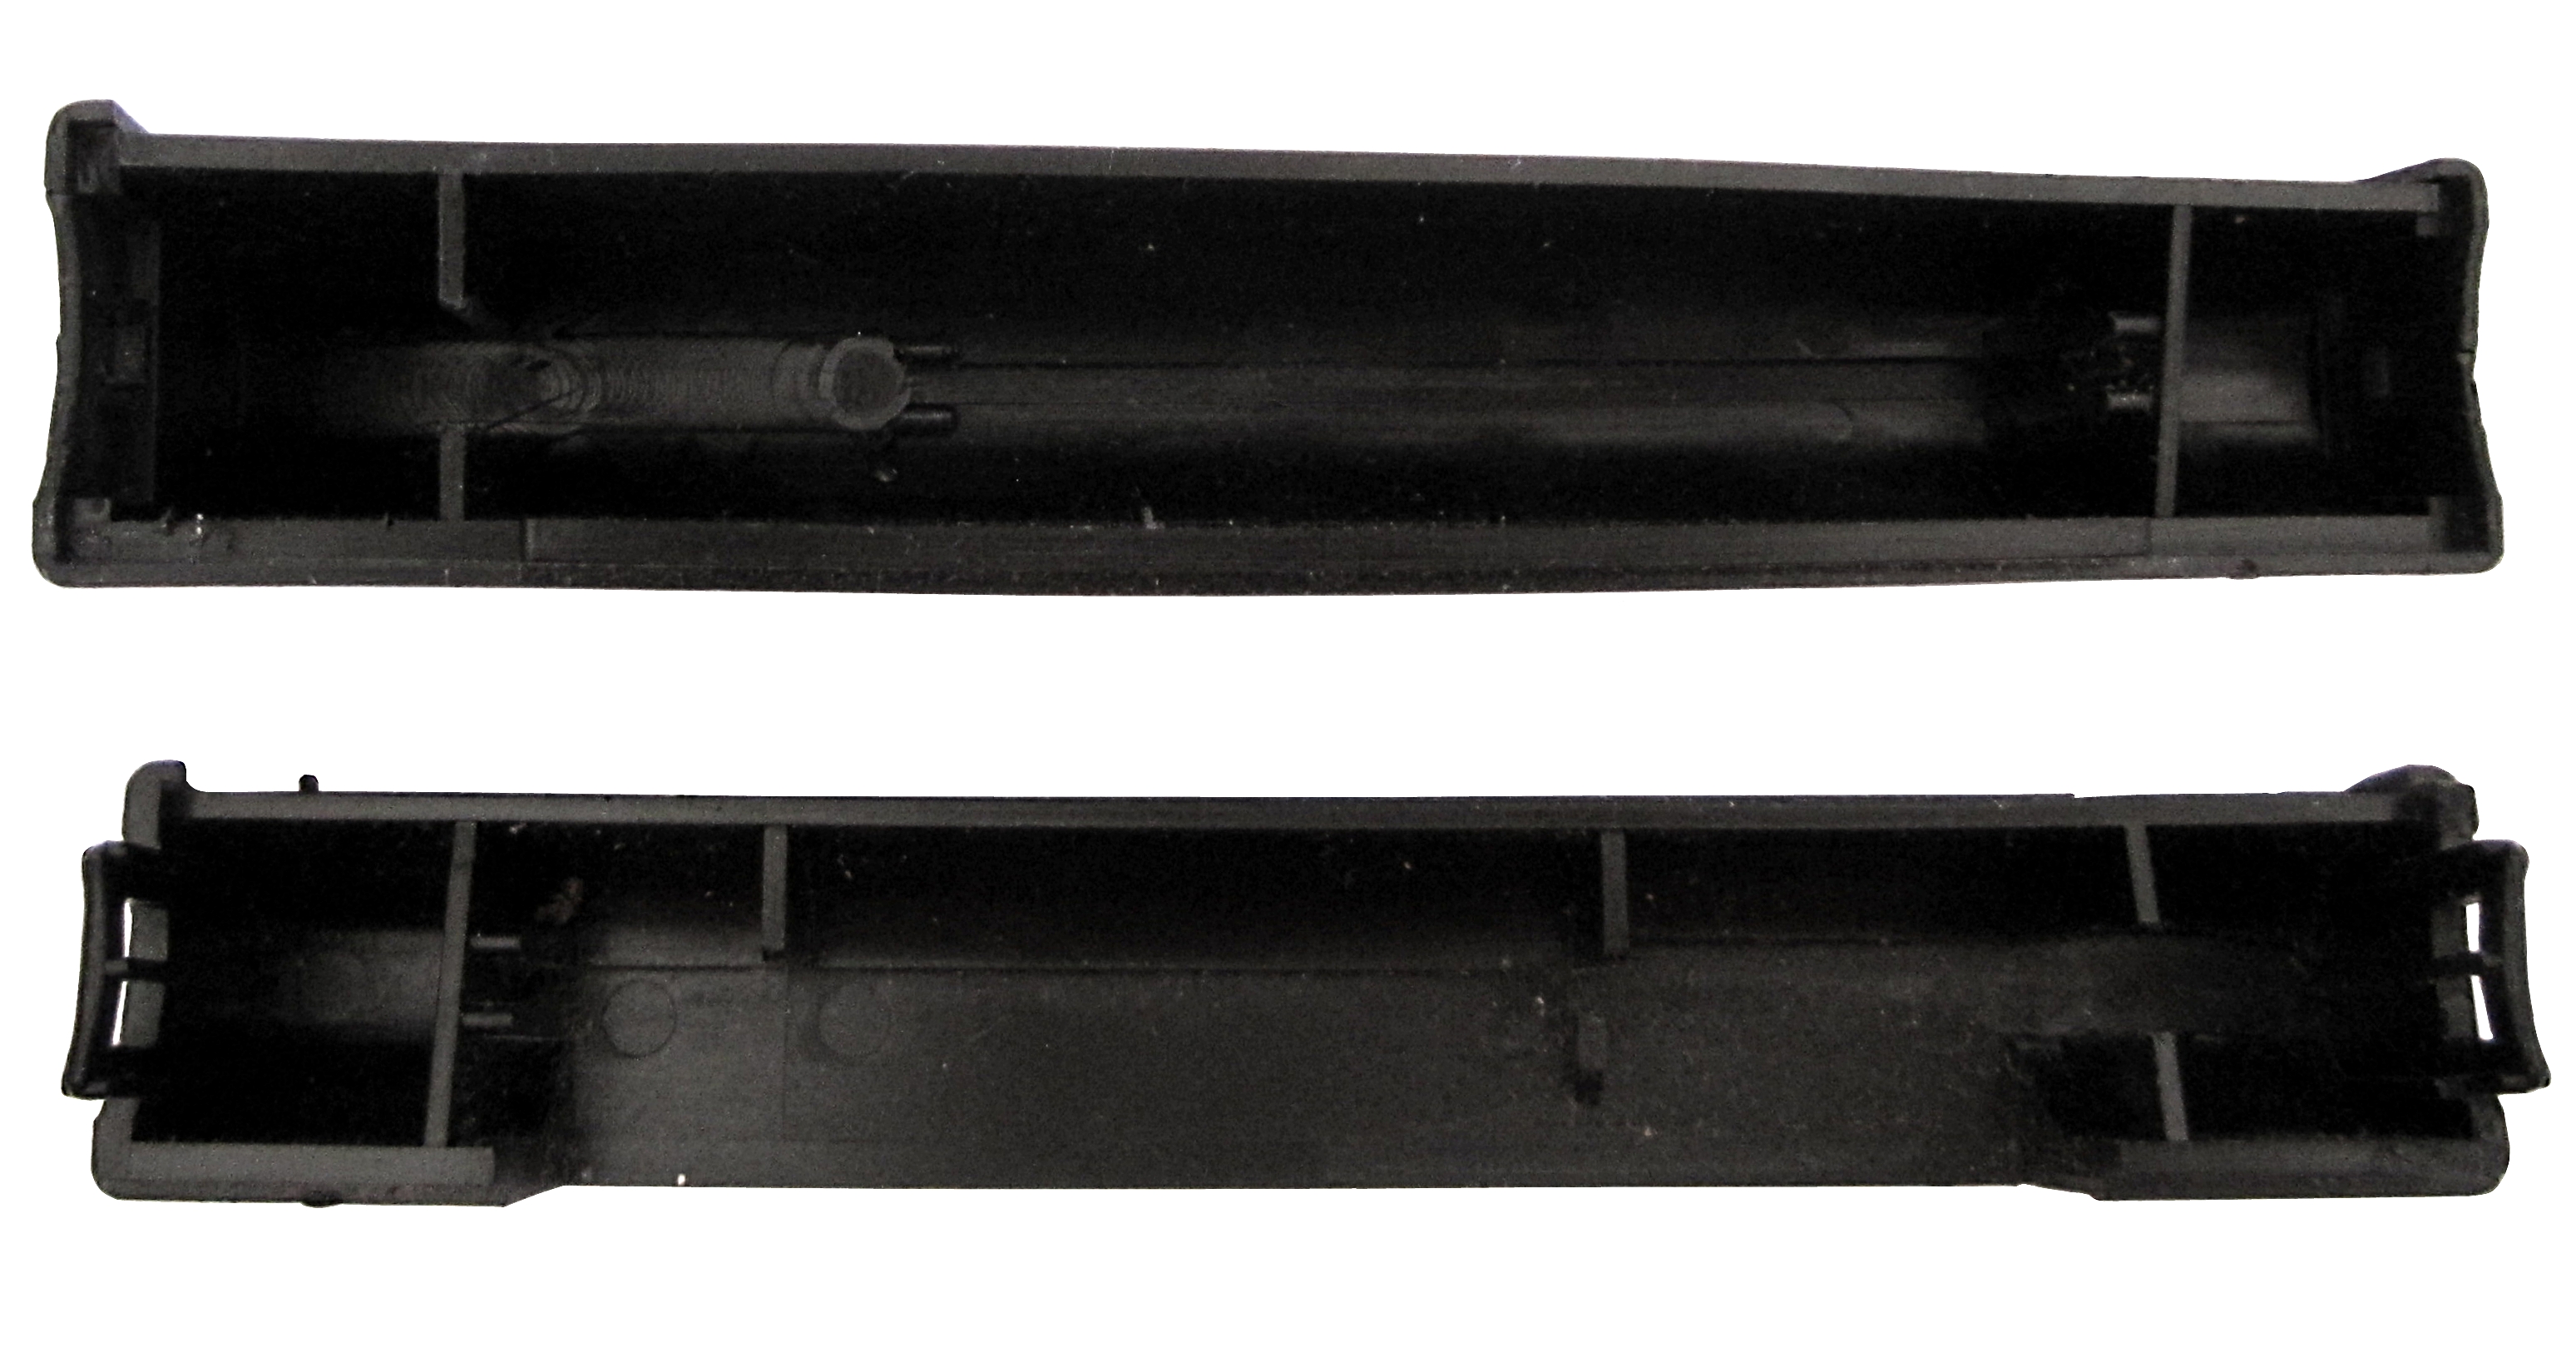
| With the case split and the PCB removed, you can
see the "snap-clips" at either end of the bottom
half that holds the case together. |
 |
| Vertical view of the two halves - showing the
locating slots that the PCB sits in. (There is a
point to these uninteresting photos, as will become
clear . . . . ) |
 |
|
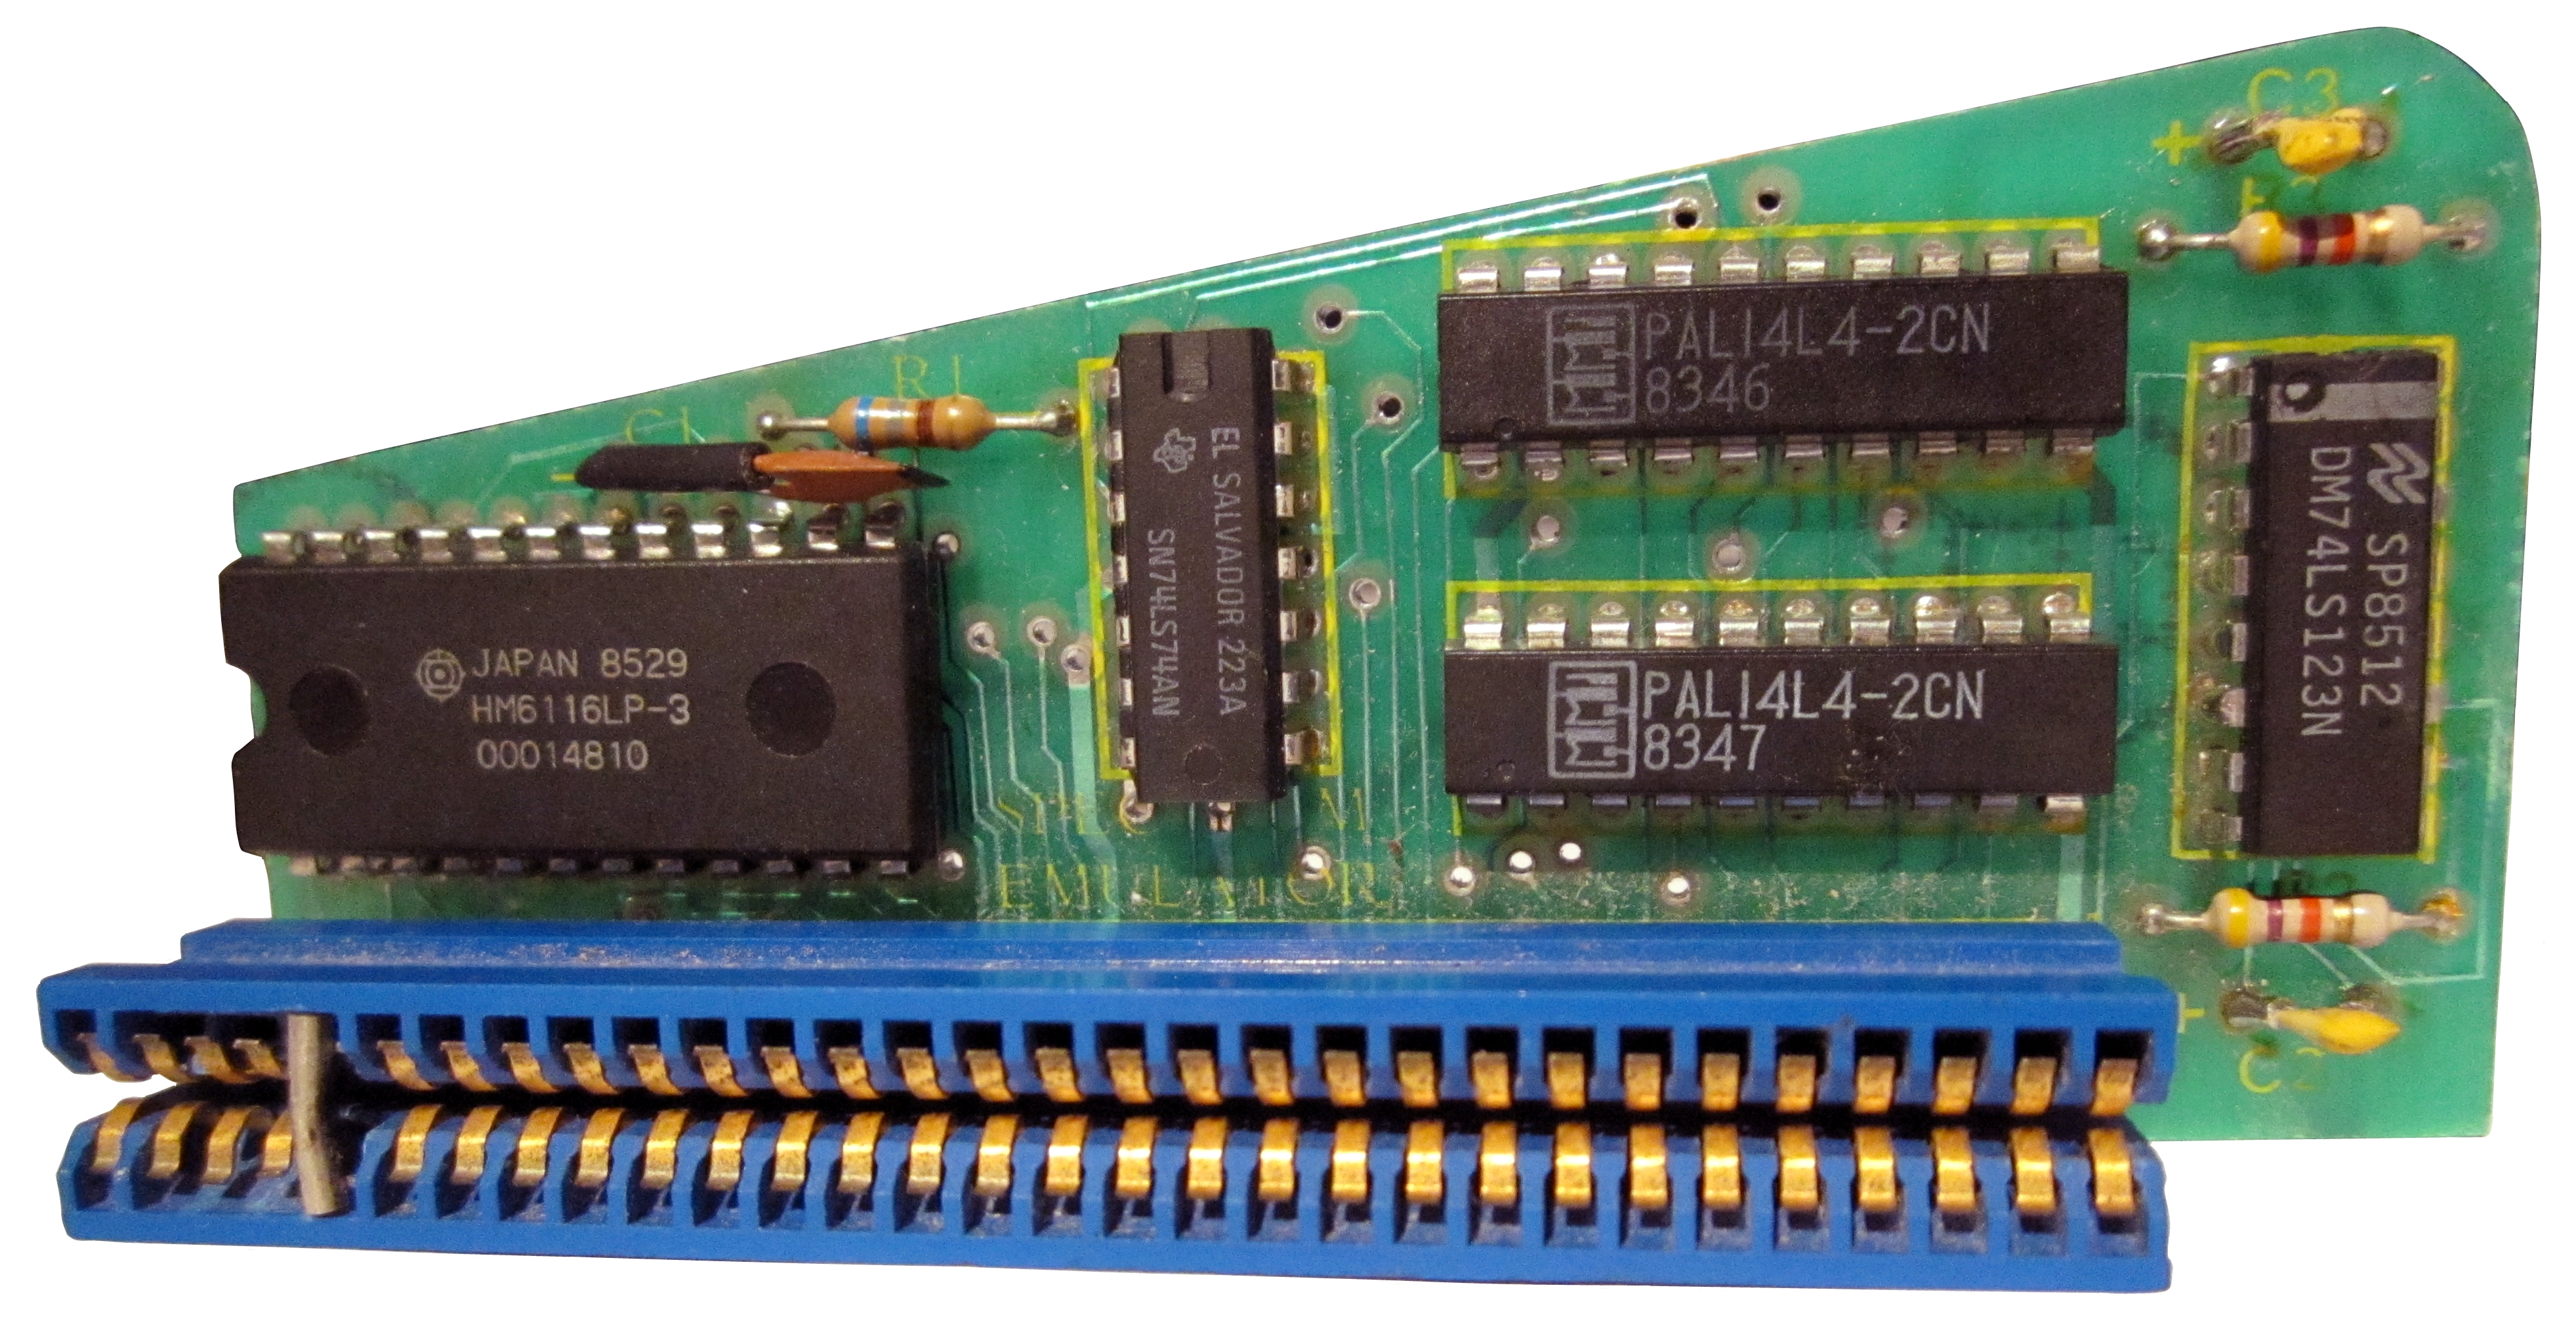
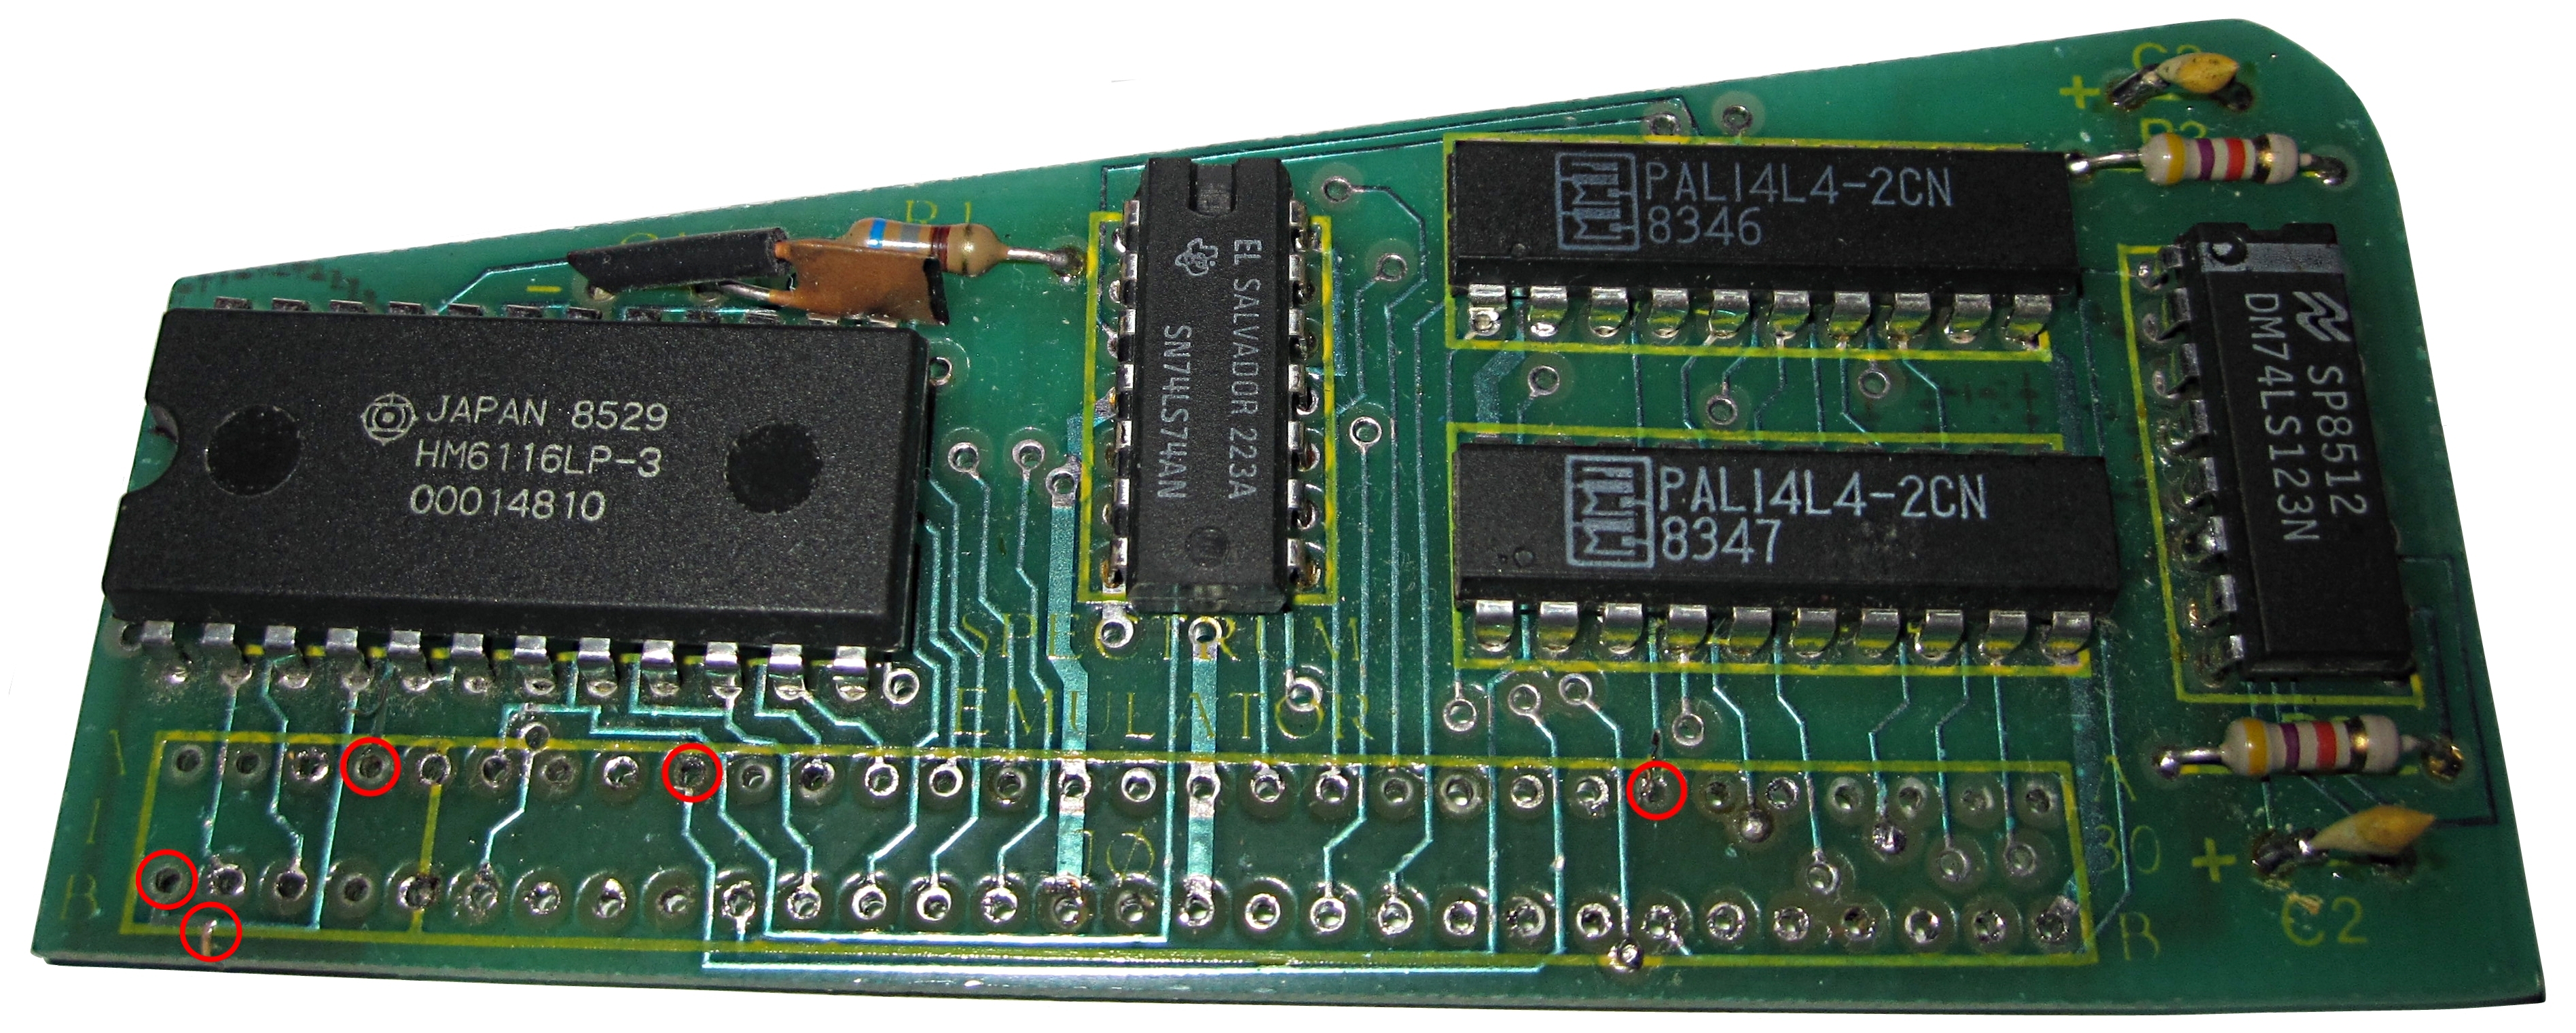
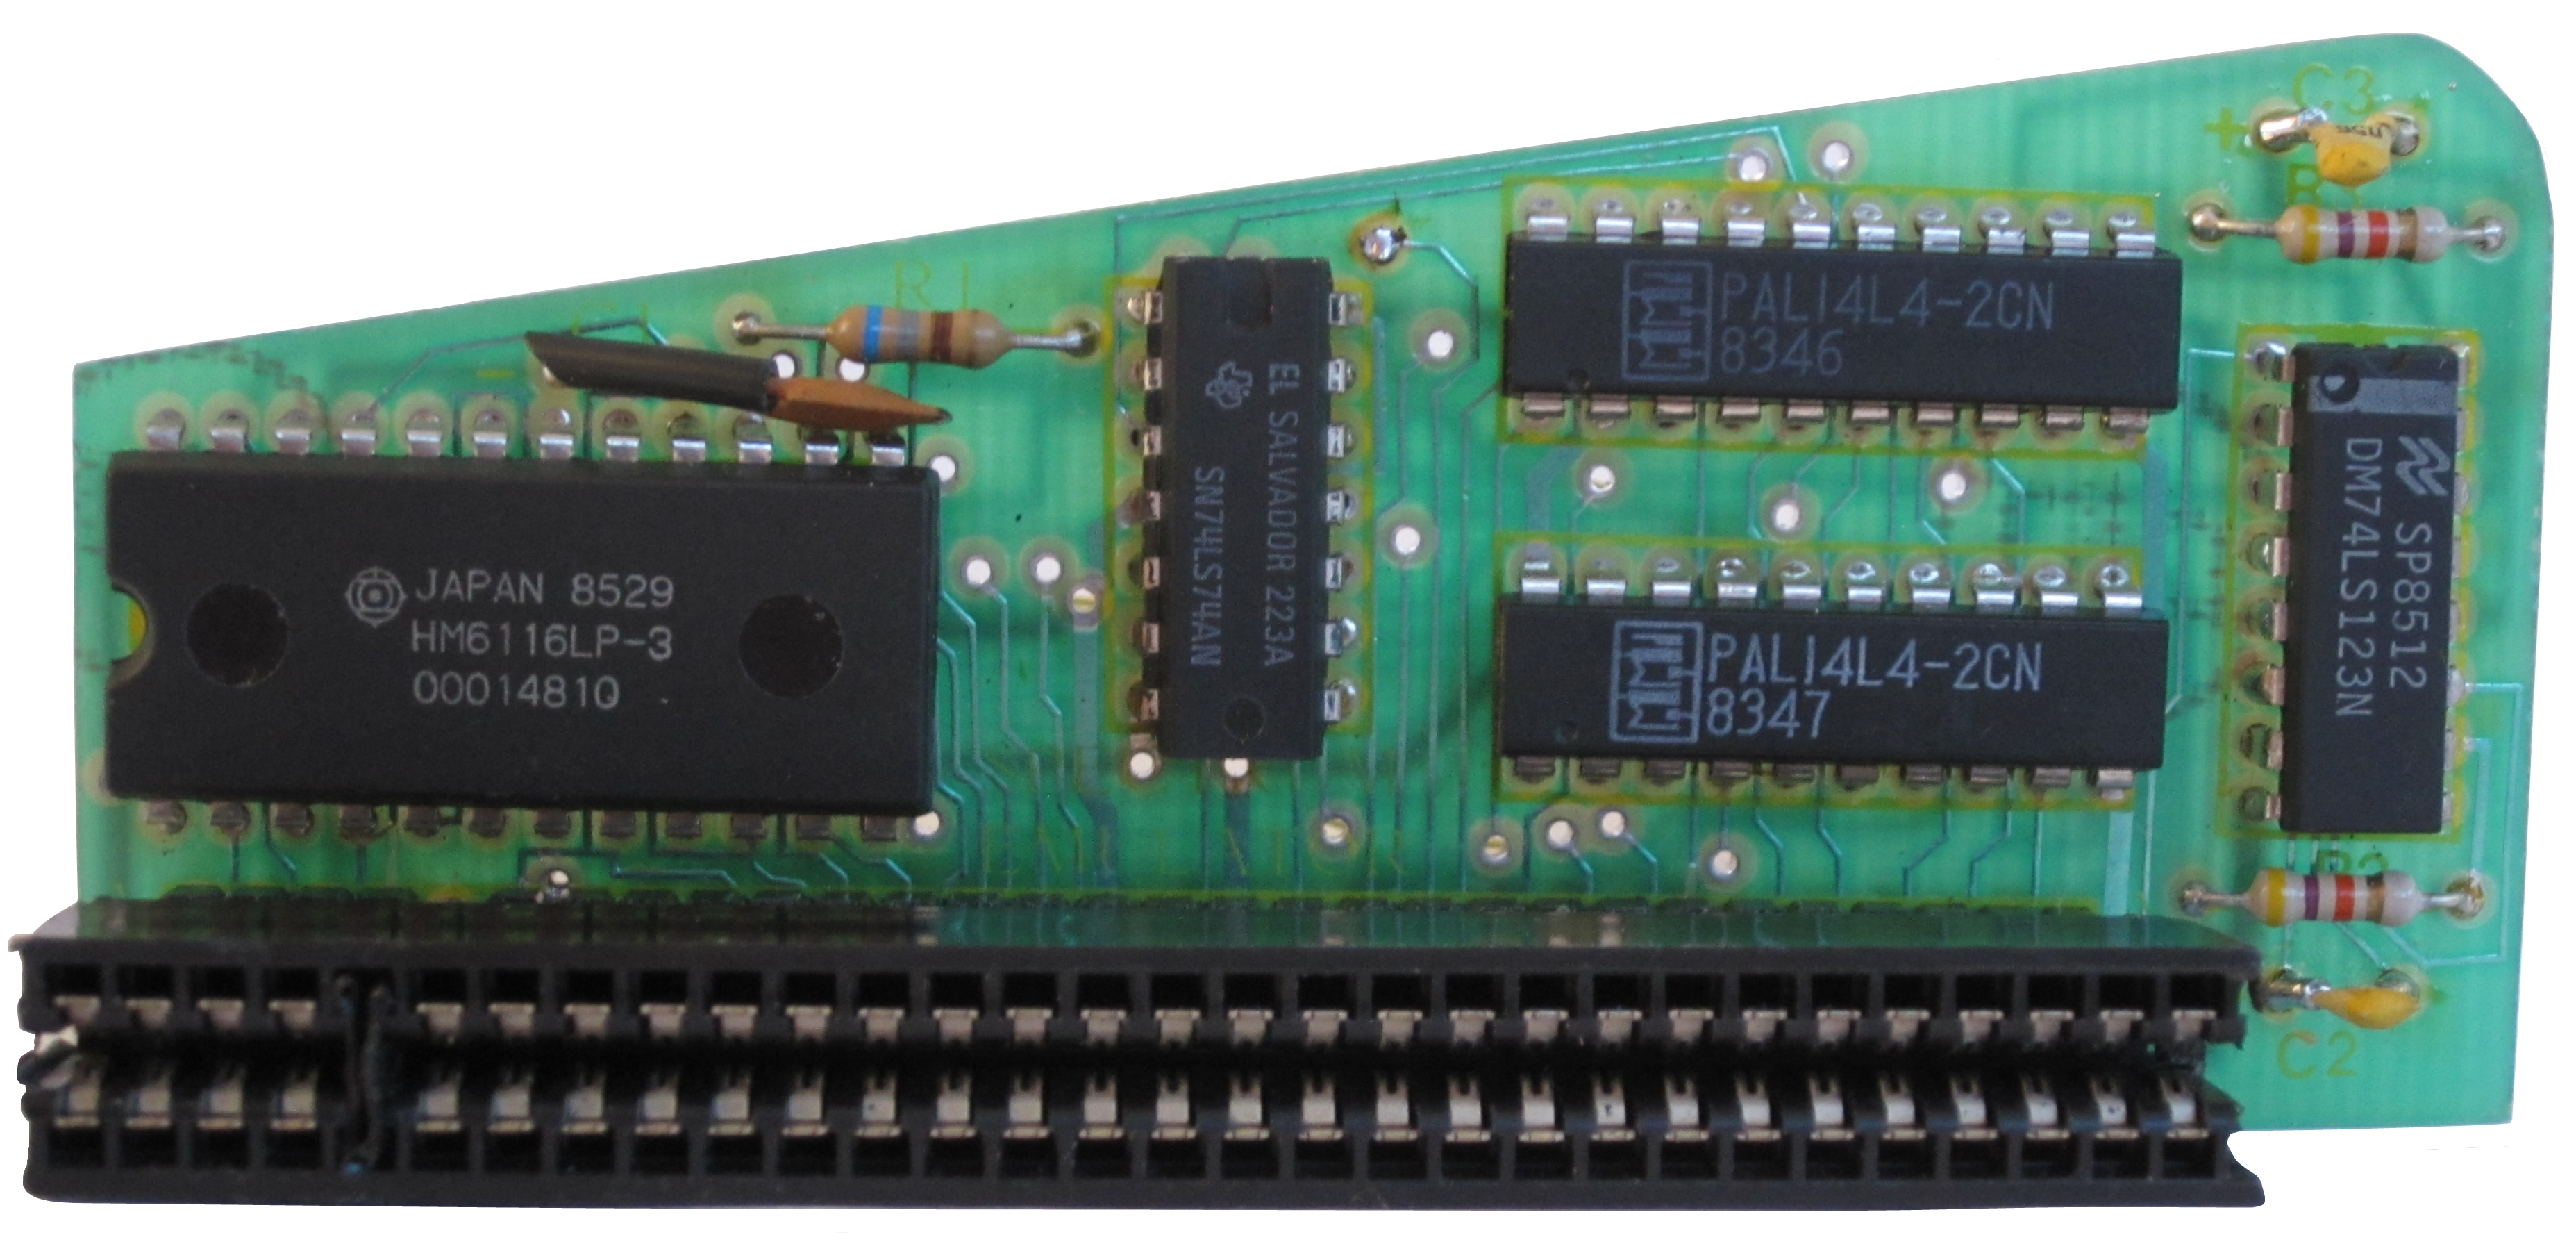
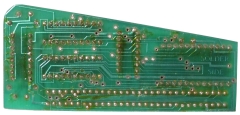
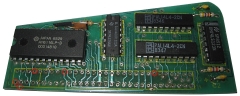
With the
case removed, you can see how few components are
fitted.
The large chip is a 2K memory chip, an Hitachi HM6116P-4
200ns
SRAM, a 74LS123 (dual monostable multivibrator), a 74LS74
(dual flip-flop), two
PALs with custom programming and a few resistors
and capacitors.
|
 |
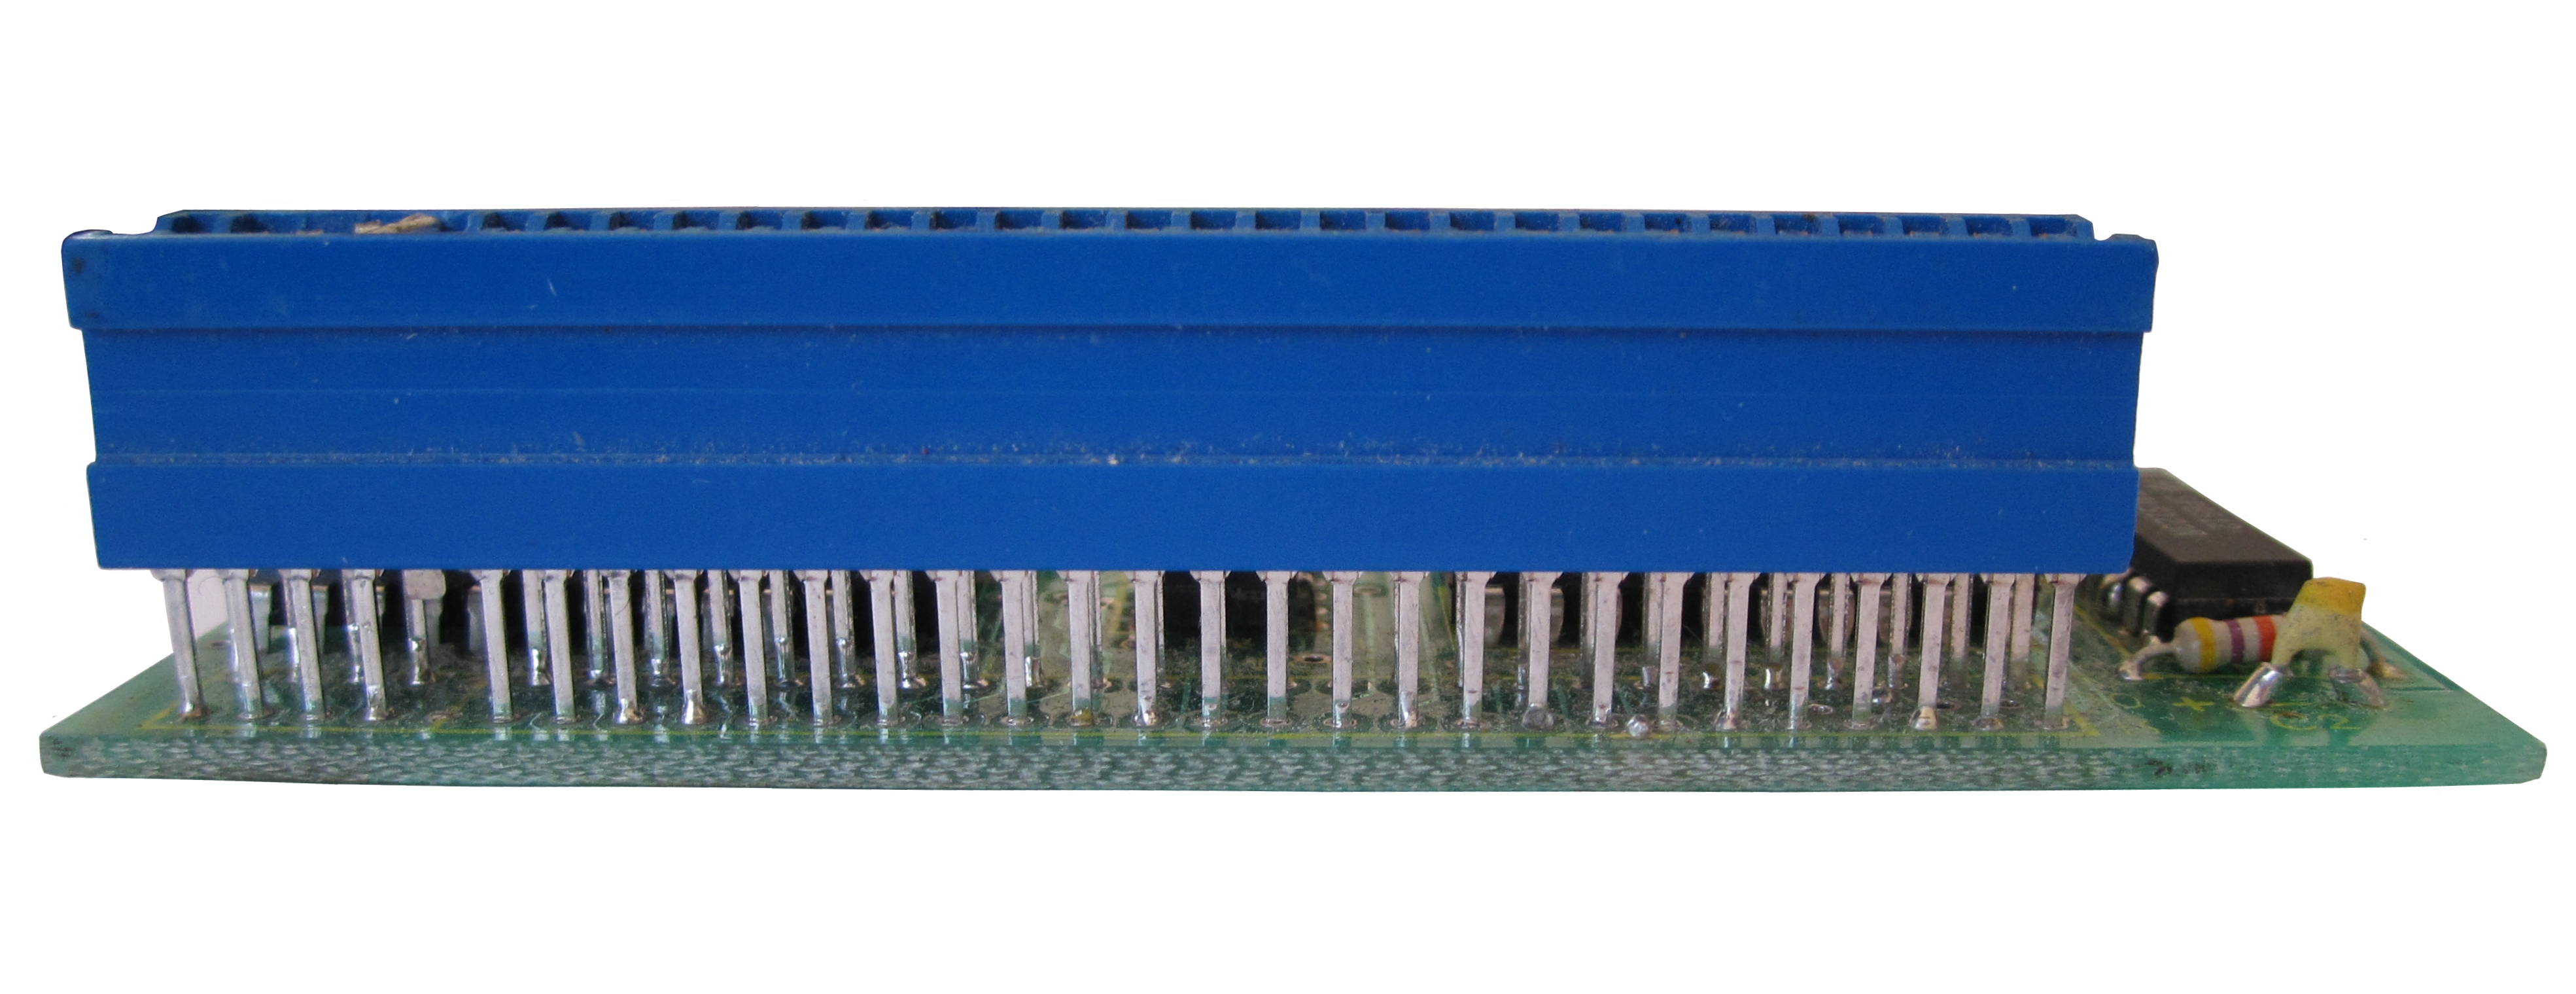
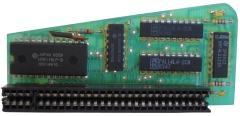
| View of the solder side of the board. |
 |
| When it became obvious that the Speculator had a
fault, I wondered whether there were any tests that
I could do to establish whether the MTX was even
communicating with Speculator. Tony Brewer was
very helpful and able to provide some details on the
self testing routine that he had written into the
code. It should have been possible to write data to
some output ports and read it back through
corresponding input ports. |
| Loopback
Port Tests |
| Output Port |
Input Port |
| 31 |
31 |
| 126 |
254 |
| 254 |
126 |
|
| I wrote a small BASIC
program which wrote values from 0 to 255 to each of
the output ports shown and read back the data from
the corresponding loop-back port. In all cases,
when values from 0 to 127 were written, the same
value was read back, but for values 128-255, the
values read were also 0 to 127, i.e., the output
value - 128. These results were repeatable over a
number of power cycles of the MTX and indicated a
problem with bit 7 of the data bus, either a fault
on the card or the memory chip. (The same MTX was
working correctly with
MAGROM
which seemed to confirm that the MTX edge connector
and data bus were OK.) |
|
At this
point, things got slightly more complicated as the
MTX also developed a fault. Even with nothing
attached to the expansion bus, the MTX would only
run for a very short time before "crashing". This
had a number of symptoms, including, the BASIC "Ready"
screen freezing, the system dropping into PANEL and
freezing and the screen clearing to a pale green
colour and freezing.
After
investigation, I found that the problem was a faulty
CPU, after changing out the Z80A
processor, the "crashes" stopped. Although it is
possible that either Speculator or MAGROM
had damaged the CPU, I think this was just an
unfortunate coincidence, particularly as the failure
has not reoccurred with either device attached since. |
|
After I had replaced the CPU, I
repeated the loop back test described above, and
found the results were markedly different to the
previous ones. The values read back from the input
ports bore no relation to the values written to the
output ports and in fact were the same as when
Speculator was not connected.
I found that putting gentle pressure
on the edge connector caused the returned values to
change, it was not possible to isolate a particular
area of the connector as being the source of the
problem, but some of the connections appeared to be
intermittent. |
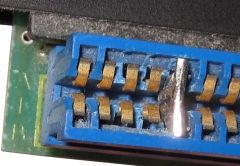
| This was not altogether surprising as the edge
connector did appear to be somewhat "distressed".
For example, the insulated separator between
contacts 2 & 3 and 3 & 4 are missing and the locator
key in position 5 is rather bent, though probably
not enough to prevent it doing it's job or to cause
a short circuit (it is metal). The contacts
themselves were also very tarnished. |
 |
|
Although
there was continuity between the individual contacts
and the corresponding PCB terminals, many of the
contacts had a noticeable lack of "spring".
I tried
to reshape some of the contacts to put more pressure
on the edge connector, but even if this had been
beneficial, I was not confident of the long term
reliability of the connector and decided that it
needed to be replaced. |
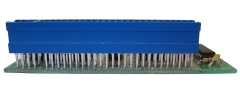
 |
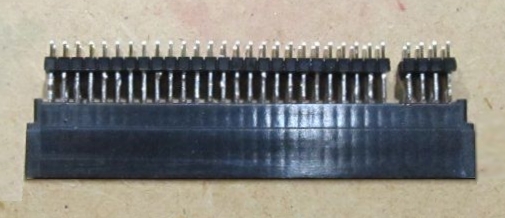
| The PCB sat in its slot in the lower half of the
case, the edge connector is unusual, the bottom of
the edge connector stands about 7.5mm off the
surface of the PCB, this is necessary to allow the
connector to protrude through the case far enough to
mate with
the MTX cartridge port. |
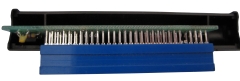 |
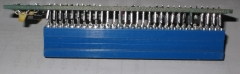
| A typical, flush mounted edge connector would
barely have cleared the case and would not have
allowed Speculator to mate with the cartridge port. I
initially thought that if I replaced the edge
connector I would not be able to reinstall the
Speculator in its case afterwards - this would have
been disappointing, but likely to have been the only
way to revive it. |
 |
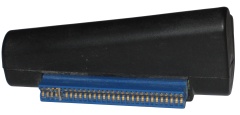
| While I was trying to think of a way of
extending a flush mounted connector, Martin made me
this "special", it will lift the connector off the
PCB by ~9mm, meaning that I can refit the case -
thanks very much Martin ! |
 |
| The tracks on the Speculator PCB are very fine
and easily damaged, to try to limit the chances of damaging
the PCB when removing the old edge connector, I
snipped the contacts close to the connector before
trying to remove it. |
 |
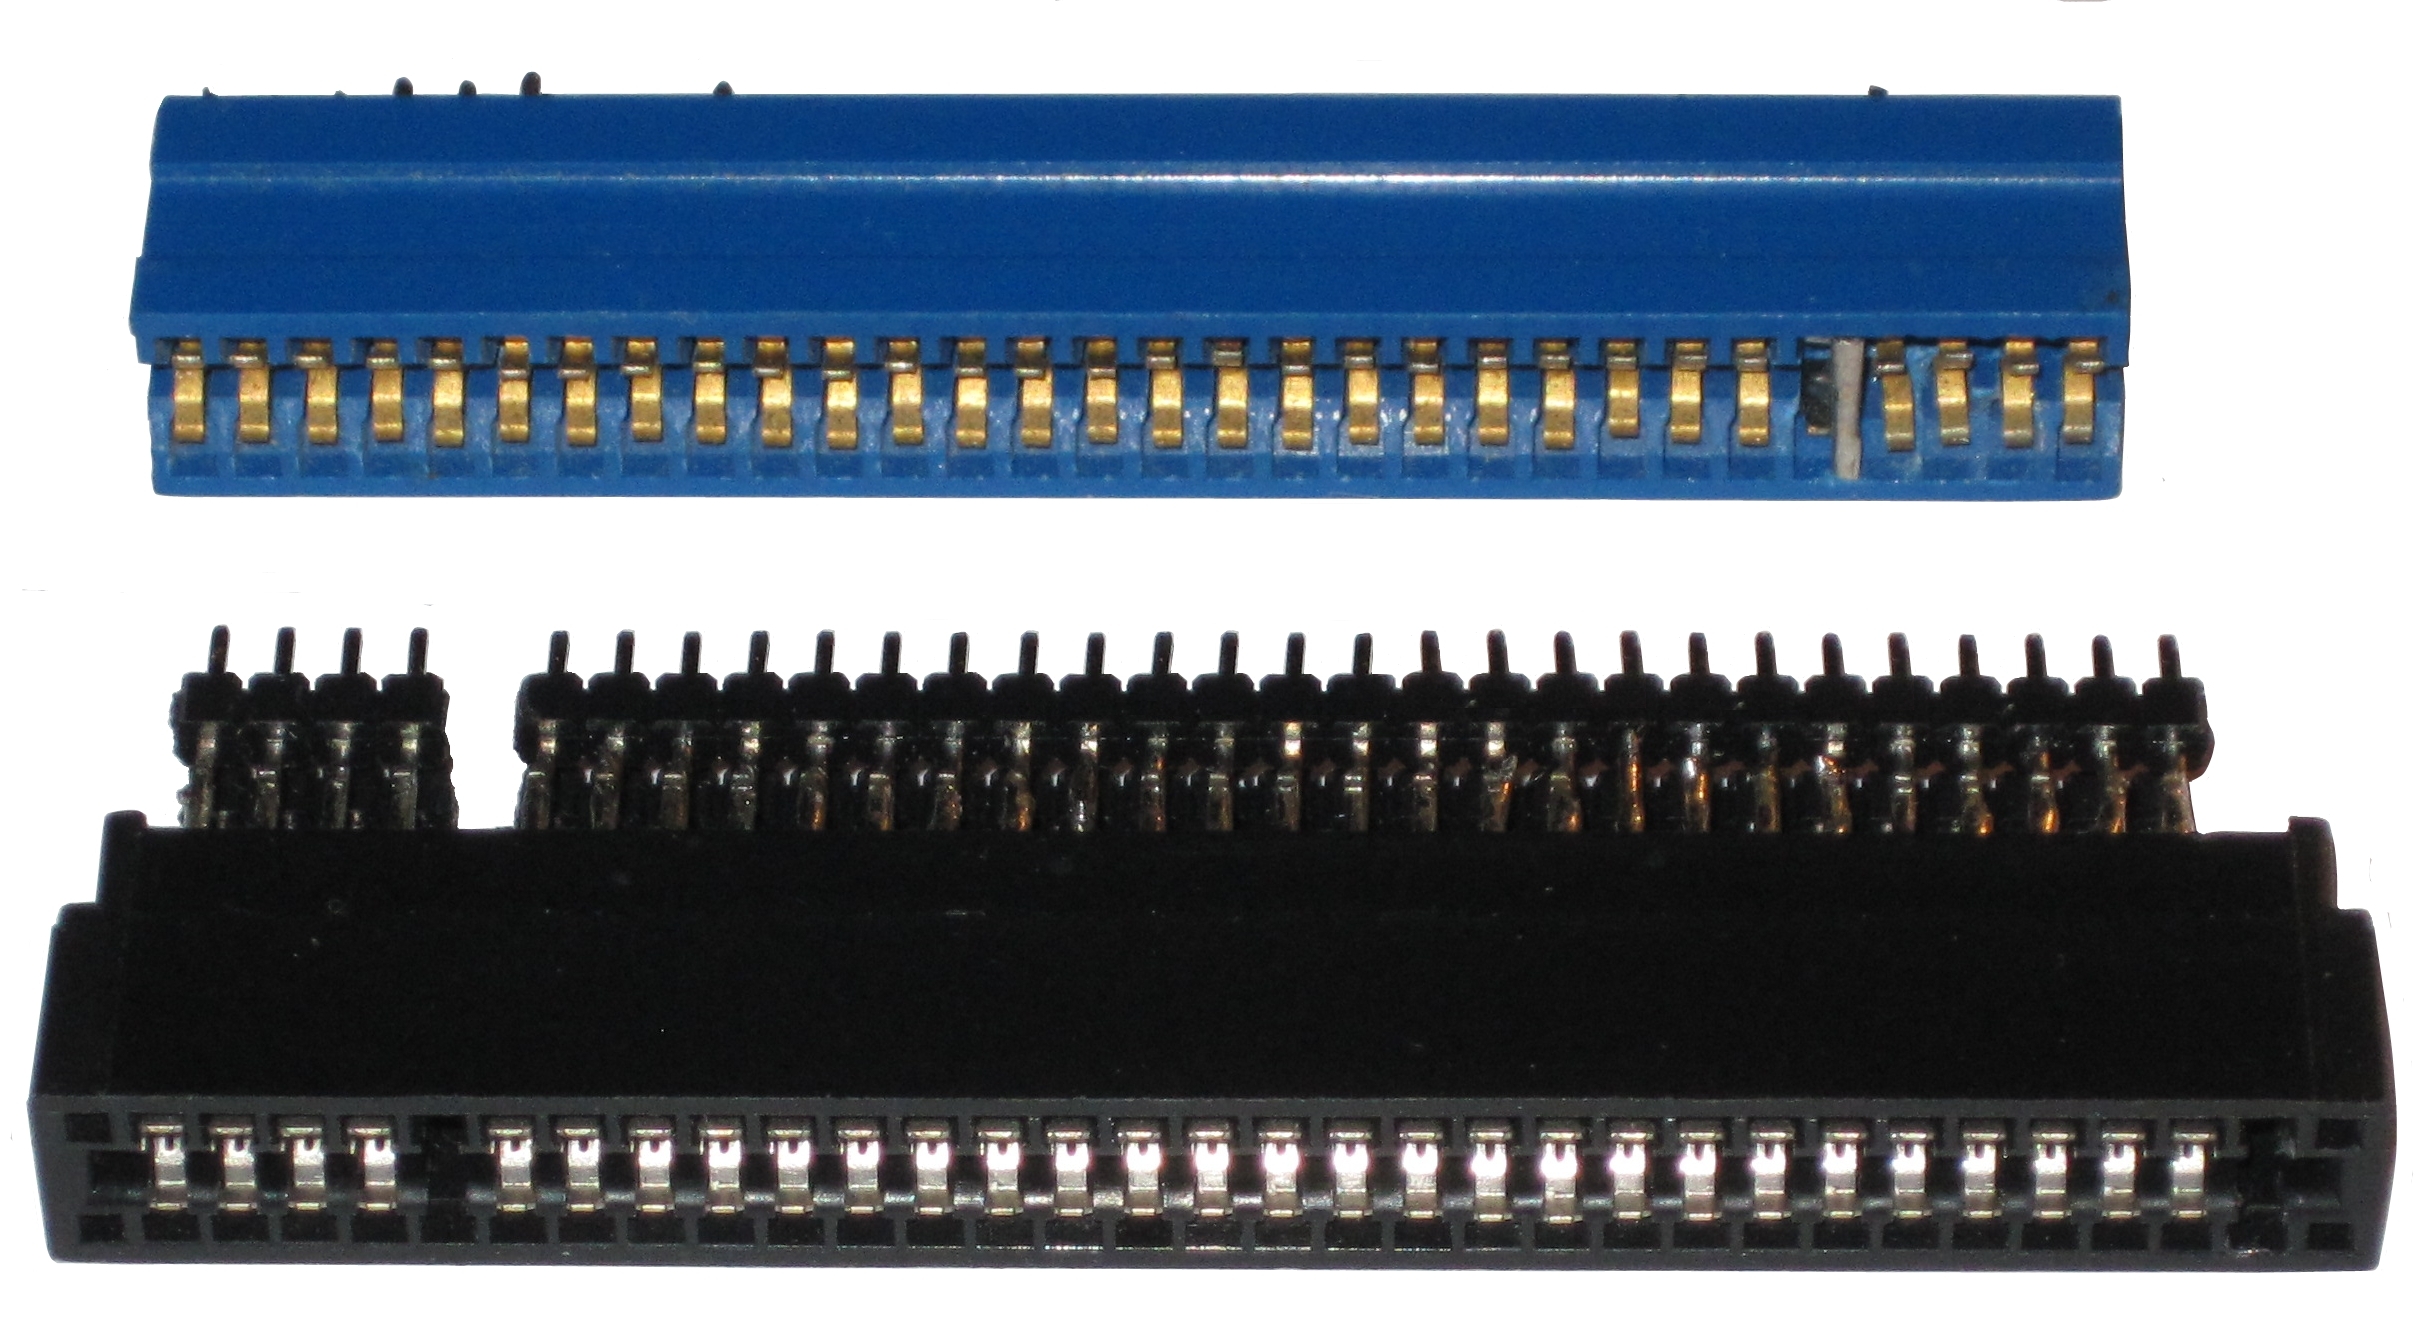
| The MTX expansion connector has 2 x 30 slots,
including the keyway at position 5. The replacement
connector was made using a 2 x 31 way connector. I
removed the contacts from position 31 and used a
junior hacksaw to trim the connector to fit the
Speculator case. I appears that Memotech had
difficulty in sourcing 30 way connectors too as the
original had also be cut to the required size. |
 |
| As I mentioned above, the traces and
vias on the PCB are very fragile and despite my
best efforts, some of the pads separated from the
barrel of the vias when the old connector legs were
removed and I also damaged a couple of the connected
tracks. Rather than try to repair the board, I
decided to repair any faults after installing the
replacement connector. |
 |
| The replacement connector fitted to the PCB.
From this side - it looks pretty good, however . . .
. . . . . . .
|
 |
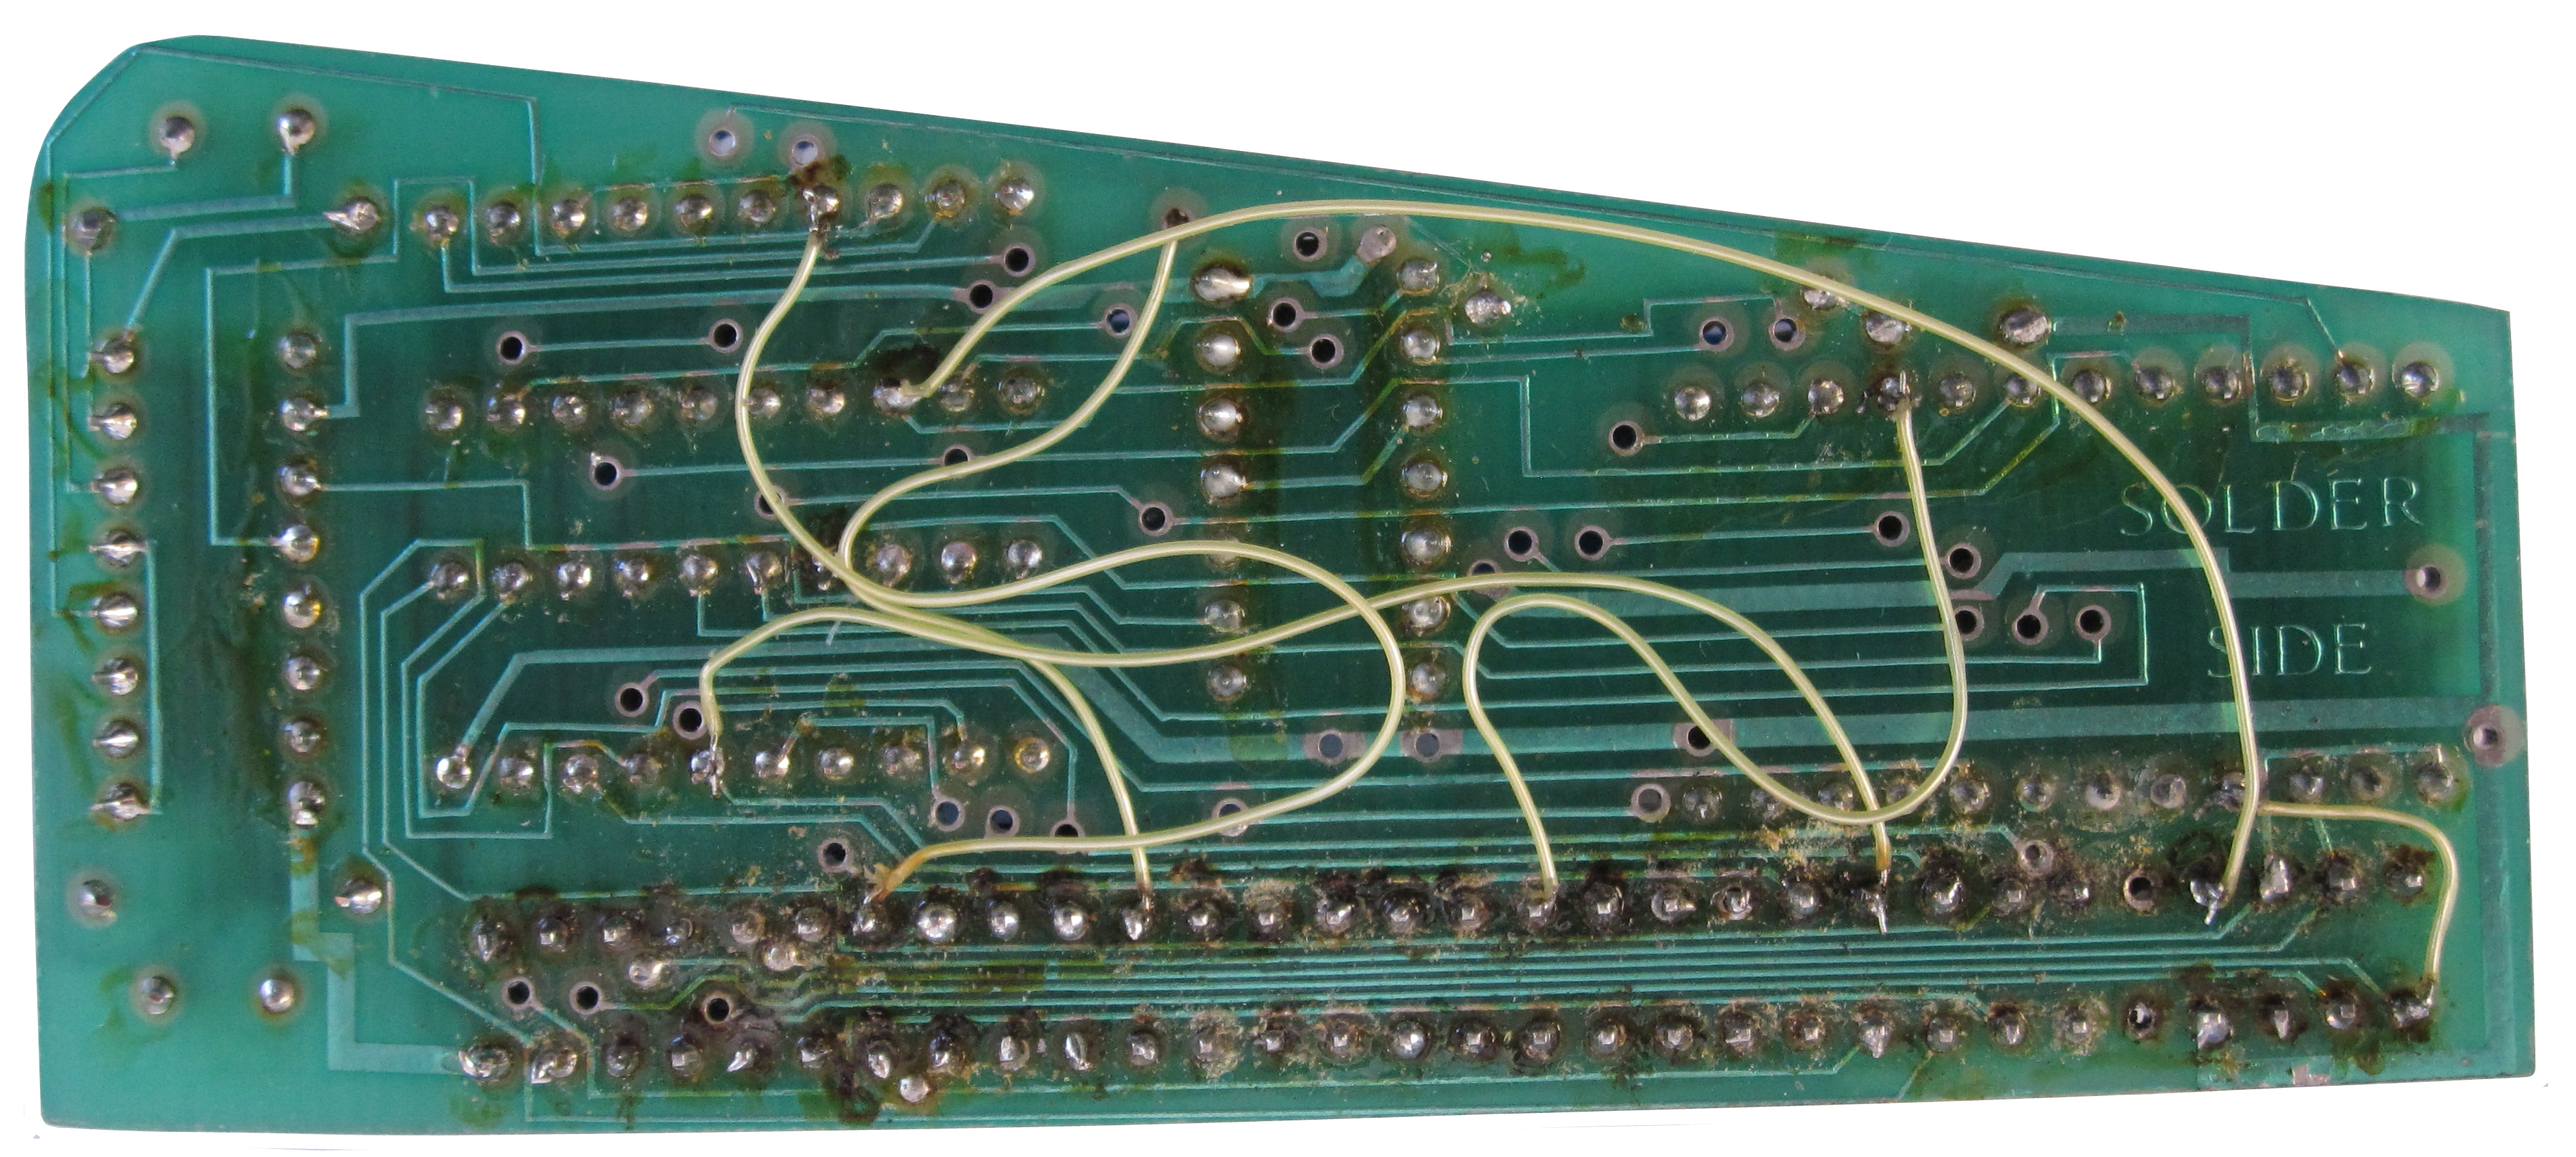
| It is not quite so neat on the solder side!
Using my Speculator schematic, I checked all of the
connections on the PCB and added Memotech style
yellow wires to remake the connections that I had
broken when I replaced the edge connector. |
 |
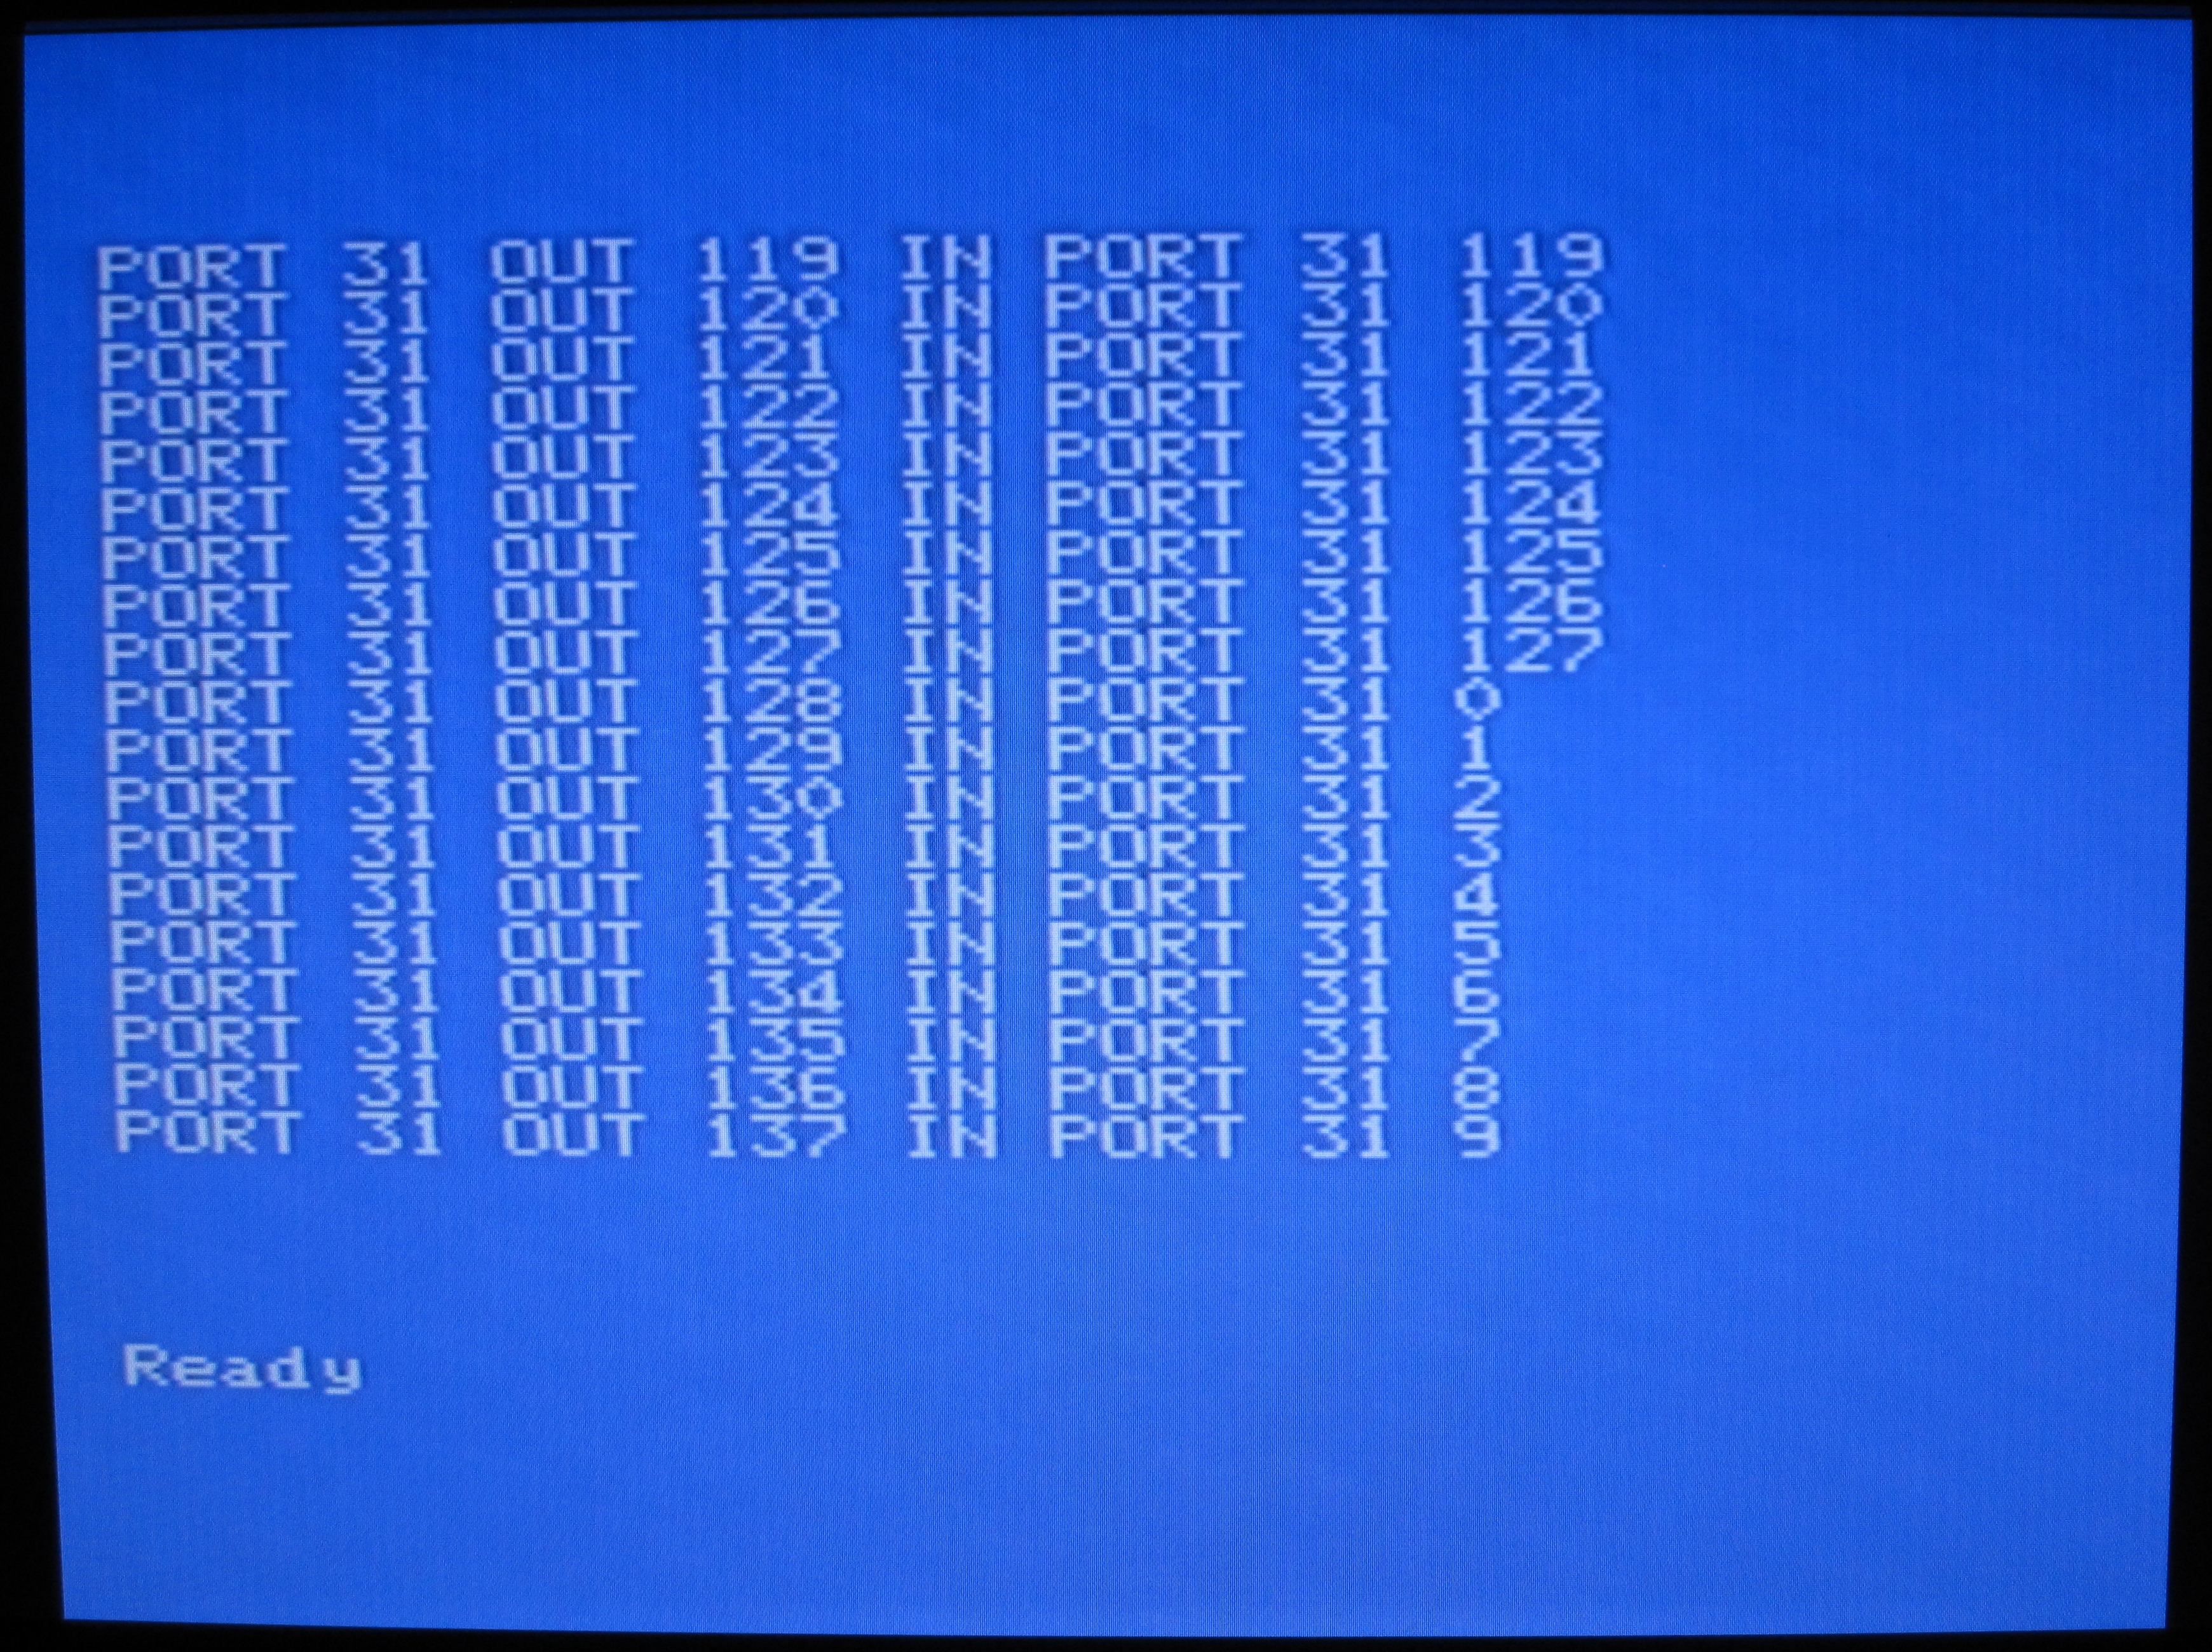
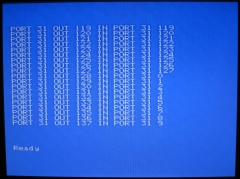
| With the Speculator re-attached, the connection
between it and the MTX connector was much more
secure and did not suffer from the bad connection
problems seen previously. On testing it, I found
that the board was back to the same state that it
was previously, i.e., it did not respond to the
Speculator program tape, it was possible to write
and read data from the output ports, but, as shown
in this screen shot, data bit 7 still appeared to be
stuck low, indicating a SRAM or bus problem.
So, despite my bodging, Speculator seems to be no
worse for the experience! |
 |
| |
|
| To be
continued . . . . . . . . . |
|
|
Next step is to try to isolate the problem
using my Logic Analyser |
|
|
Potentially replace the SRAM chip |
|
| |
|
| |
|
| |
|
| |
|
| |
|
|
|
| |
|
|