|
 |
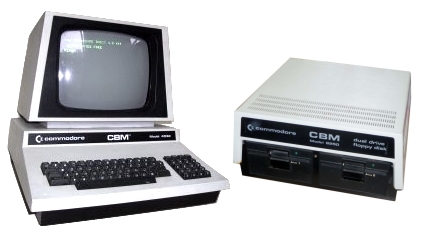
Commodore PET Projects
- petSD+ |
petSD+ - Firmware
Last Firmware Update :
Get it here
Revision History here
July 8th 2019 :
IMPORTANT UPDATE ON NODISKEMU FIRMWARE STATUS
Please read before updating the firmware in your
petSD+
Overview
The petSD+ NODISKEMU firmware is based on
sd2iec, created by Ingo Korb (et
al.), the most common use for this firmware is in the emulation of a
Commodore
1541 disk drive for the
Commodore 64
computer, but Nils Eilers has added support for the IEEE-488
disk drives used with the PET/CBM range.
sd2iec is open source, released under the
GNU GPL license and is available from the
Git
repository here. Unfortunately,
there isn't a manual for sd2iec, although some information is
available from the
README file in the archive and some more "user friendly"
information has been posted to the
sd2iec page on the
C64 wiki.
Quoting from the wiki, some features relevant to the PET are
:
-
D64/D71/D80/D81/D82
image file support
- PRG/P00
etc. support
- Limited
REL
support
- Supports FAT long file names
- Supports FAT12/FAT16/FAT32 formatted SD and SDHC cards
- Supports most typical IEC functions (LOAD, SAVE, OPEN,
GET, PUT, CLOSE, ...)
- Real Time Clock (RTC) support
This page describes how to load petSD+ firmware onto a blank
MCU, i.e., one that does not already contain a compatible copy
of the sd2iec boot-loader. Upgrading an operational petSD+ with
updated firmware is a trivial task - jump to the end of this
page for details.
Implementation for petSD+
Based on discussion with Ingo Korb, for petSD+, Nils has
created a fork of the sd2iec firmware called NODISKEMU with its
own
repository on Github. As of June 2015, this branch of
sd2iec is still under development, it includes the enhanced
IEEE-488 routines and D80 / D82 support from Nils'
petSDduo firmware ("emily")
but at this point, does not use the LCD display (work on this is in progress).
A comparison of the features of the petSD+ NODISKEMU firmware
with those of alternative PET SD card solutions can be found on
my firmware comparison page
(currently a "work in progress").
Loading NODISKEMU to petSD+
This is made up of two distinct operations :
- Program the AVR with a boot-loader
- Place a copy of the NODISKEMU on SD card
The sd2iec Boot-loader
petSD+ uses the boot-loader that is part of the "standard"
sd2iec project. Each time that the device is powered up, the
boot-loader scans the root directory of the SD card, looking for
a copy of the binary file for the application.
The files in the root directory are read, if the file size
matches the expected length of a firmware binary and the file
signature (which includes version, checksum, and firmware type)
is valid, it can potentially be used to upgrade the firmware in
the AVR. If the firmware file is compatible, then, provided that
the version number is 0, or is greater than that currently
installed in the AVR, the flash is reprogrammed with the updated
firmware.
If an updated firmware file is not present, the system
attempts to run the code currently in the flash.
Step-by-Step Instructions - courtesy of
Nils Eilers
NB : Later versions of petSD+ (firmware
versions 2017/04/05 and later) include support for the
JiffyDOS
Fast Loader on IEC devices. This functionality requires a 16MHz
oscillator, rather then the original 18.432MHz, and a custom
version of the boot-loader is needed to work at this clock
frequency.
Download the boot-loader from its
official download page
(Original petSD+ with
18.432 MHz oscillator) |
http://sd2iec.de/bootloader/ |
| |
|
| Download the latest "newboot-binaries"
file |
Version 0.4.1 or greater is required |
| e.g.,
newboot-0.4.1-binaries.zip |
Unzip the file and extract the required hex file |
| for
petSD+, the file is
newboot-0.4.1-petSD+-m1284p.hex |
(or later) |
OR
Download the boot-loader from my
site
(Later petSD+ with 16 MHz oscillator) |
New Bootloader for 16Mhz petSD+ |
| |
|
| Download the
file |
|
| e.g.,
new-bootloader-for-16-MHz-petSD-plus.zip |
Unzip the file and extract the required hex file |
| the file is
new-bootloader-for-16-MHz-petSD-plus.hex |
|
Program the AVR
flash with the boot-loader downloaded aboveAs described on my
Tools page, the
hardware needed to program the AVR depends on
whether you need to edit and recompile the code, or
just need to download pre-compiled code as a binary
file.
For petSD+, we just need to download the hex
file, so we can use
AVRDUDE.
Install AVRDUDE |
| |
|
| Download the appropriate
version for your system from : |
http://download.savannah.gnu.org/releases/avrdude/ |
|
For Windows |
|
|
Download the latest file with "mingw32"
in its name |
e.g., . . . . .
/avrdude/avrdude-6.1-mingw32.zip |
|
Unzip the file to where you want to run it from |
|
|
avrdude.exe and avrdude.conf
will be created |
(The files are also compatible with 64 bit
Windows) |
| |
|
|
For Unix like OSs, use the
appropriate command |
|
e.g. |
Debian GNU/Linux |
| |
FreeBSD |
| |
OS X with MacPorts |
| |
OS X with homebrew |
|
| |
| sudo apt-get install avrdude |
| sudo pkg install avrdude |
| sudo port install avrdude |
| brew install avrdude --with-usb |
|
| Using AVRDUDE |
|
| |
|
| The documentation for AVRDUDE (PDF)
is available from : |
http://download.savannah.gnu.org/releases/avrdude/ |
| and also
available on-line (HTML) at : |
. . . . . . /avrdude/user-manual/avrdude.html |
| |
|
| AVRDUDE is a command
line utility and uses a number of
command line switches, with a large number of
options, to control its execution. The number of
options may appear quite daunting, but are
relatively easy to use and well described in the
documentation, the specific requirements for petSD+
are detailed below. However,
should you prefer to use a graphical user
interface GUI), a Java program called
Burn-O-Mat is available for the OSs mentioned
above at :
http://avr8-burn-o-mat.aaabbb.de/avr8_burn_o_mat_avrdude_gui_en.php
Burn-O-Mat has an on-line fuse calculator
available on its webpage, but reading / writing of
the MCU requires that the application is installed
on your computer. Since Burn-O-Mat uses Java, the
Java SE Runtime Environment (JRE), the appropriate
version of JRE for your operating system must be
installed and the configuration file edited to
include the ATMega1284P used in petSD+. |
| |
|
| JRE can be
downloaded from : |
http://java.sun.com/javase/downloads/index.jsp |
| |
|
| Command
Line Execution Since the whole point of using
AVRDUDE in this instance is to program a device that
is itself intended for use with a computer without a
GUI, then using a command line tool should not be
too much of a hardship.
Windows users : since working with the command
line is quite unusual these days, a reminder of how
Copy & Paste works in Windows command windows might
be useful -
click to pop up in a new window |
| AVRDUDE
Parameters |
|
| |
|
| The minimum parameters that AVRDUDE
needs are : |
|
| |
|
| |
("cable", "-c") |
| |
|
| |
(-P <port>) |
| |
|
|
Examples : |
-c stk200 -P lpt1 |
| |
-c avrispmkii |
| |
-c usbasp |
| |
|
| |
(-p partno) |
| |
for petSD+, this should be |
|
| the type of programmer being
used |
| |
| which computer port the
device is attached to |
| legacy Atmel STK200 parallel
port programmer |
| |
|
| AVR ISP mkII |
(-P not needed for USB) |
| USBASP |
(-P not needed for USB) |
| |
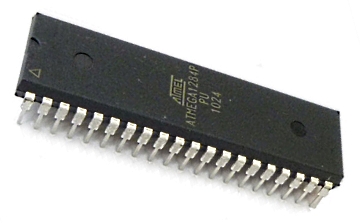
| the type of controller (MCU)
connected |
| -p m1284p
OR -p m1284 |
|
| |
|
| Testing
communication with the Programmer Before
trying to program the device, it is a good idea to
check that you can successfully communicate with the
programmer on its own by sending it simple commands,
for example, to set the speed of how fast the
programmer will communicate with the MCU, using a
USB connected Atmel AVR ISP mkII for example, you
would enter :
|
|
avrdude -B 50 -c
avrispmkii -p m1284p |
(-B specifies the bit clock
period in µs) |
This value is very slow, but
should work under all circumstances. If we try
to write to the programmer at too high a rate
(with the -B value too low), the write will
fail.
In the example below under
Windows, with no programmer connected,
avrdude prints out a failure message, in this case, reporting
that it could not find the programmer on the USB
port
|
|
 |
Note : A
similar error will be reported if the USB drivers
for the programmer have not been installed. If you
have not installed the drivers for the USB
programmer, see my
petSD+
Tools page for details of how to do this.
With the
programmer available, but no MCU connected,
avrdude reported the warnings and errors shown below
: |
|
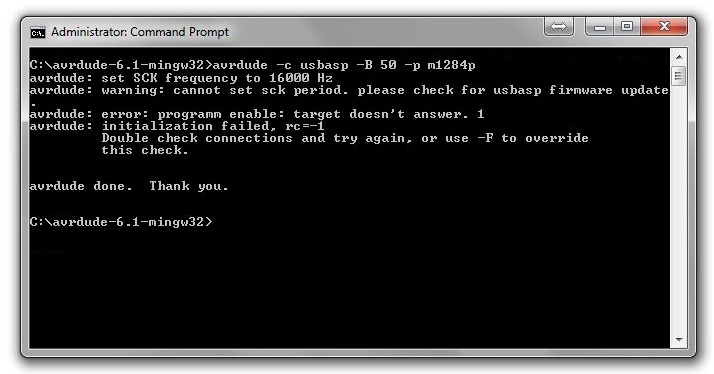 |
The "target
doesn't answer" error is hardly surprising - as
the MCU was not connected, however, the "cannot
set sck period. please check for usbasp firmware
update" warning is worth mentioning.
If
you "Google" that warning message, you will find
that it is a common problem with the cheap Chinese
USBASP programmers such as mine. It seems that many,
if not all, of those cheap programmers come with an
older version of the firmware which does not support
setting the SCK frequency. For programming petSD+,
the warning is not a barrier to doing the job, it is
just an annoyance. When I programmed the first set
of petSD+ MCUs, I just ignored it, but I quickly got
fed up seeing the warning and upgraded the
programmer's firmware
as described here.
The
screen dumps from this point onwards were taken
after the USBASP firmware has been updated.
With the MCU connected, you should get output such
as :
|
|
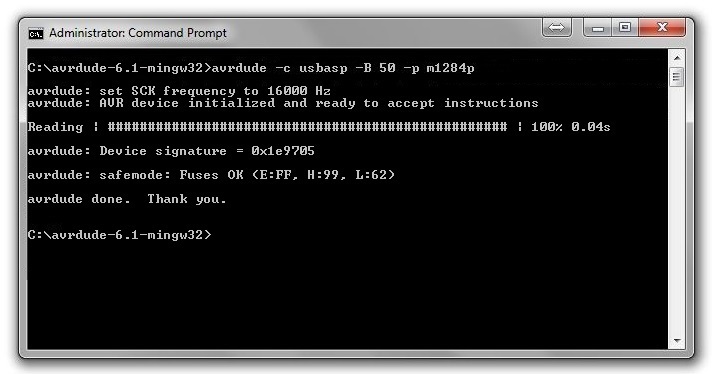 |
The program output shown above, confirms that
AVRDUDE can communicate with the MCU and has read
the device signature and current fuse settings. In
this case, the device signature is correct for an
ATmega1284P (1e9705) and the fuse configuration
corresponds to the default values for the device. If
the MCU has previously been used, the fuse settings
may be different, but there should be no error
messages reported.
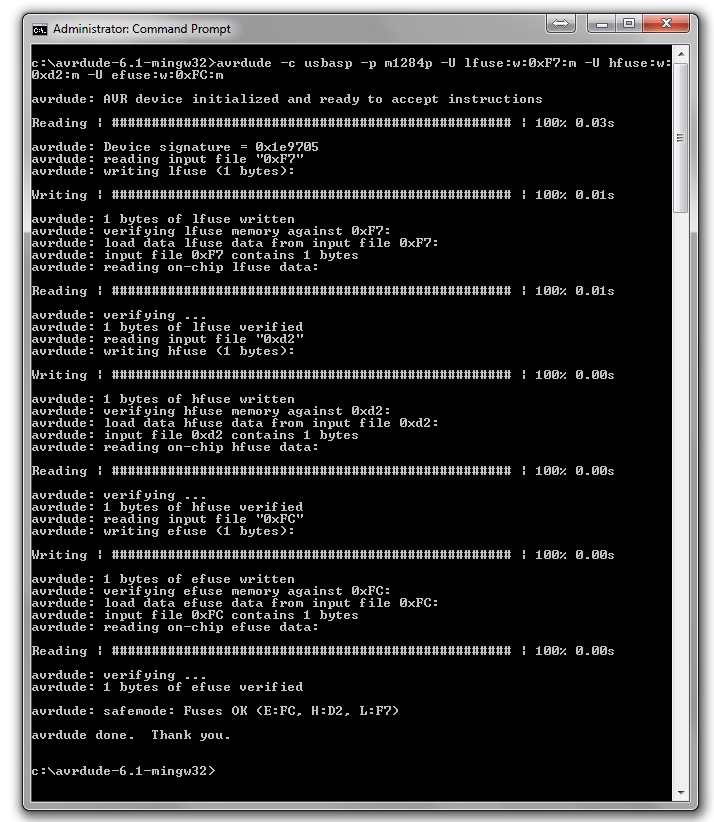
We can now set the
fuses to the required configuration for petSD+ using :
avrdude -c usbasp -p m1284p -U
lfuse:w:0xF7:m -U hfuse:w:0xd2:m -U efuse:w:0xFC:m |
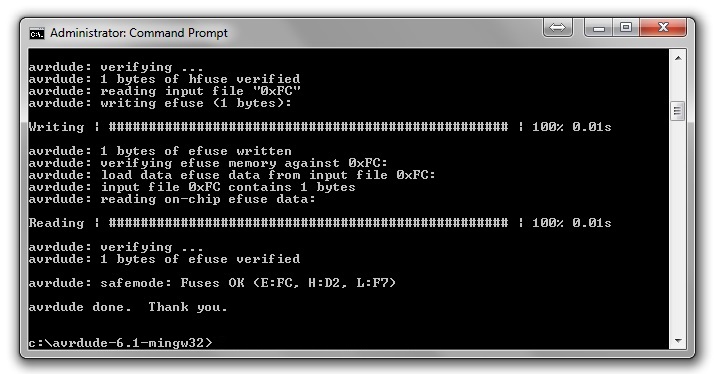 |
AVRDUDE will generate a lot of output (if you are
interested, click on the image to see the full
listing) as the fuse data is read, written and
verified. You can ignore most of this, but the
output should end with the last two lines shown,
i.e.,
avrdude: safemode: Fuses OK (E:FC, H:D2,
L:F7)
avrdude done. Thank you.
If setting the fuses was successful, we can proceed
to loading the boot-loader program. If there were
any errors reported when setting the fuses, then
these must be fixed first!
Windows users :
please ensure that AVRDUDE is able to find the
boot-loader's hex-file. The easiest way of doing
this is to place the file downloaded
previously, e.g.,
newboot-0.4.1-petSD+-m1284p.hex, into the
same directory as the AVRDUDE executable (.exe)
file.
Once the fuses are set, we're able to
program at full speed with -B 1:
avrdude -c usbasp -B 1 -p m1284p -U
flash:w:newboot-0.4.1-petsd+-m1284p.hex |
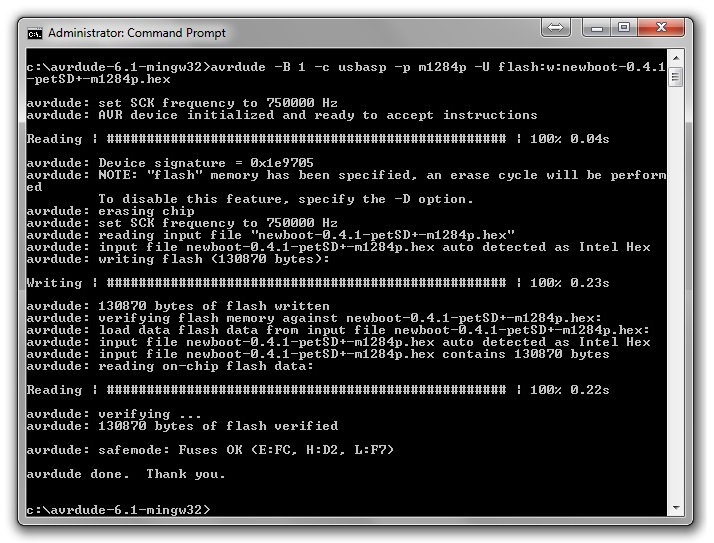 |
If no
errors are reported, then the hardest part is done!
All that remains is to copy the application
binary file to the root directory of a FAT formatted
SD card. |
Application Program (NODISKEMU) Installation / Upgrade
Boot-loader operation
Once the petSD+ MCU contains a
compatible copy of the sd2iec boot-loader, loading and
upgrade of the NODISKEMU application firmware does not
require the use of any programming hardware or software.
Each time that petSD+ is powered on, the boot-loader looks
for an updated firmware file on the SD card as described in
the sd2iec boot-loader readme file
:-
"[The] boot loader searches for files
with the correct length in the root directory of the card.
It does not care about file names at all, instead it checks
a tag at the end of the file to determine if it should flash
a file or not.
The boot loader will only flash a
file that is tagged for the correct hardware and that has
either
a) a version number that is
greater than the one currently in memory, or
b) a special version number
that designates the file as a "development version".
In case b) the boot loader will avoid
flashing the same file over and over again, but a
development version file with a different checksum will get
flashed, as well as any non-development version if the
program version currently in the chip. FAT16 and FAT32 are
always supported, FAT12 only if enabled. MMC, SD and SDHC
cards with a supported file system should all work.
The boot loader turns on the red LED
while it is running. If it cannot find a valid application
in the chip, it will flash the red LED for two seconds and
try to find a valid file once more. During card accesses the
green LED is on, during the actual flash operation the green
LED flickers rapidly."
Eventually, the release version of
the petSD+ firmware will be available for download from this
page, however, at this point, Nils is still actively
developing the firmware and a "release" version does not yet
exist.
NODISKEMU's sources are available
from
https://github.com/nils-eilers/NODISKEMU. Once a day,
these sources are compiled for all supported hardware
variants if there are any changes. Those binaries are
available for download from the
nightlies repository on Nils' site.
Install / Upgrade NODISKEMU
| Delete any existing firmware
files from the root-directory of your SD-card |
|
| Download the required binary
from : |
http://petsd.net/nightlies.php |
| Either UnZip the download to
the root directory of your SD card, or |
|
|
Copy the file from its current locationto root
directory of your SD card |
|
| Note : the
archive contains binaries for both petSD and petSD+ |
Use the file named petSD+.bin |
| Remove the SD card from your
PC |
|
|
Windows users : be sure to : |
Safely remove hardware |
| Insert the card into your
petSD+ and switch it on |
|
| The bootloader will program
the firmware that is suitable for your device |
(Even if both petSD and petSD+ are
present) |
| |
|
| The binaries can remain onto the
card, as describer above, the boot-loader won't
program a binary over and over again. Since the
files aren't required any longer, they can also be
safely deleted. |
|